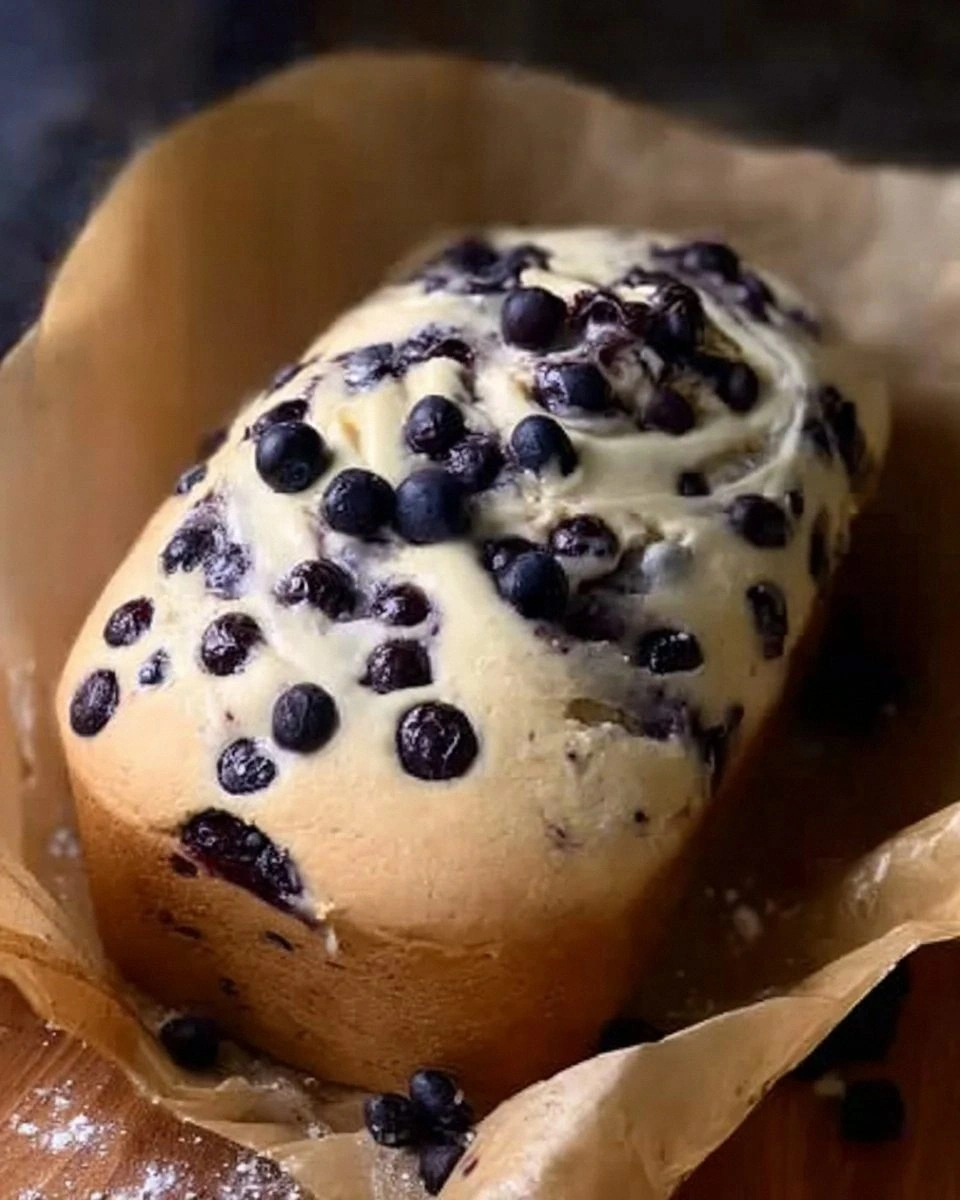
When the kitchen lights flickered and my oven timer screamed “10 minutes,” I was already halfway through a batch of burnt chocolate chip cookies. My friend dared me to make brownies that would make even the most seasoned dessert critic swoon, and I was determined to accept the challenge. I found myself rummaging through the pantry, eyes darting over cans of black beans, a jar of dark cocoa, and a tub of coconut oil that had been patiently waiting for a creative outlet. The scent of roasted beans mingled with the sharp tang of cocoa, promising a depth of flavor that ordinary brownies simply cannot match. If you’ve ever felt the disappointment of a dry, overcooked brownie, this is the antidote you’ve been craving.
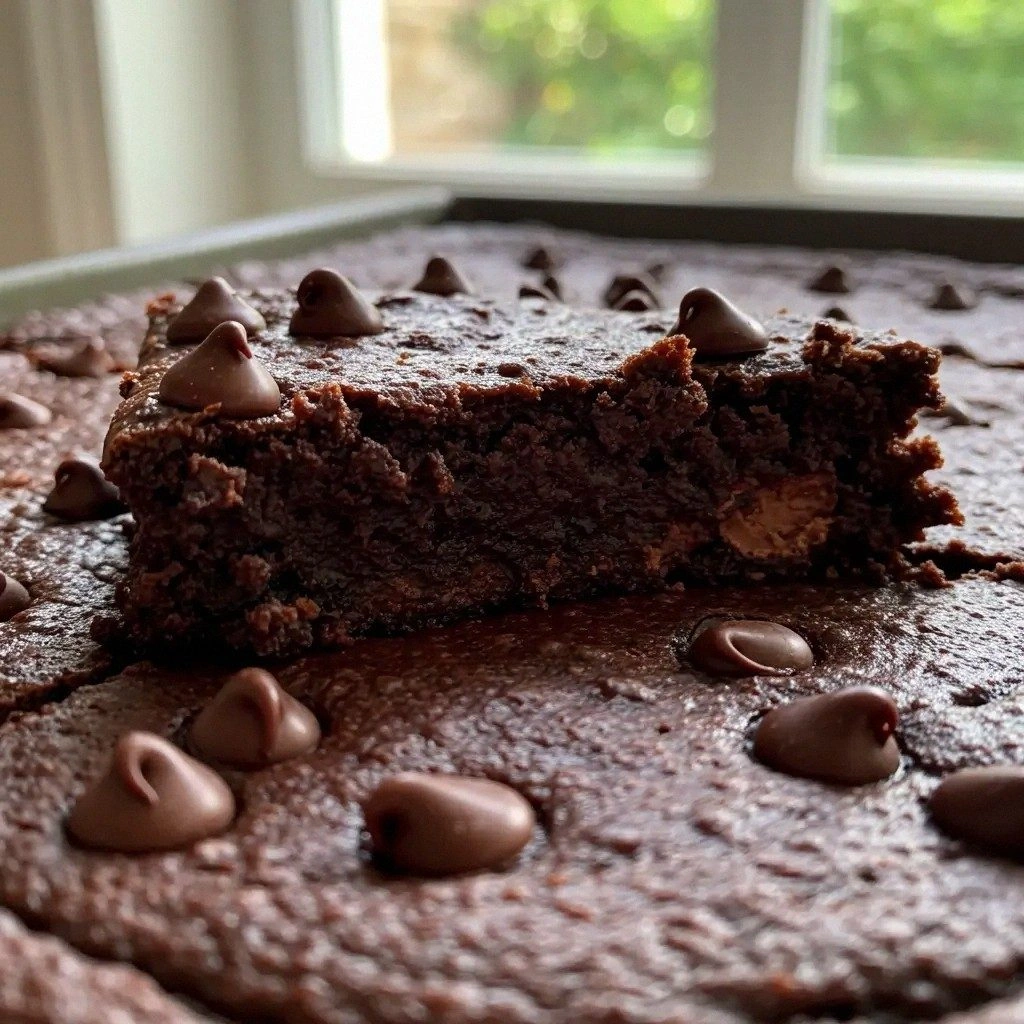
Picture this: a glossy, fudgy square that glistens with a subtle sheen, the edges crisp yet tender, and a center that oozes chocolatey richness without the dreaded crumbly texture. The first bite releases a burst of earthy bean undertones, followed by a velvety chocolate cascade that lingers on your palate. I swear, the moment the brownies hit your tongue, the kitchen fills with an aroma so intoxicating it could convince a skeptic to indulge in a second square. I dare you to taste this and not go back for seconds, because the flavor profile is so complete that you’ll want to savor every bite. This isn’t just another brownie recipe; it’s a culinary revelation that will forever change how you think about chocolate desserts.
What sets this version apart is not just the use of black beans, but the meticulous balance of ingredients that elevate the brownies from simple sweets to a symphony of textures and flavors. The beans act as a natural binder, keeping the brownies moist and dense without any added sugars or fats, while the cocoa powder provides a deep, bittersweet foundation. Maple syrup introduces a subtle sweetness that cuts through the earthiness of the beans, and coconut oil brings a buttery richness that melts in your mouth. The espresso powder adds a layer of complexity, giving the brownies a hint of coffee that enhances the chocolate without overpowering it. When all these elements combine, the result is a brownie that’s both indulgent and wholesome, a perfect example of how healthy can still taste decadent.
Let me walk you through every single step — by the end, you'll wonder how you ever made it any other way. From selecting the right beans to mastering the perfect bake time, this recipe covers every nuance with confidence and flair. I’ll share micro‑challenges that will test your taste buds, bold claims that will convince even the most skeptical, and honest confessions that will make you feel like a fellow culinary adventurer. Most recipes get this completely wrong, but here’s what actually works. Stay with me, because the next part? Pure magic.
What Makes This Version Stand Out
- Flavor Depth: The combination of black beans, cocoa, and espresso creates a layered taste profile that feels both earthy and indulgent. The beans provide a subtle, nutty undertone that balances the bitterness of the chocolate. Skipping the beans would result in a flat, overly sweet brownie that lacks character.
- Texture: Coconut oil and almond milk keep the brownies moist and fudgy, while the flour adds structure without making them dry. The beans act as a natural binder, giving the brownies a dense, chewy mouthfeel. Without them, the brownies would crumble and lose their signature heft.
- Simplicity: Only thirteen ingredients, all pantry staples, make this recipe incredibly accessible. You can whip up a batch in under an hour, even if you’re a beginner. The method is straightforward, with no elaborate steps that can trip up novices.
- Healthier Profile: Black beans add protein, fiber, and essential minerals, turning a guilty pleasure into a balanced snack. Coconut oil contributes heart‑healthy fats, and maple syrup offers a natural sweetener. The result is a dessert that satisfies cravings without compromising nutrition.
- Versatility: The brownies can be served warm or cold, plain or topped with a scoop of ice cream, and even used as a base for other desserts. They pair beautifully with espresso, coffee, or a splash of bourbon for an adult twist. Their adaptability makes them a crowd‑pleaser at any gathering.
- Make‑Ahead Friendly: These brownies keep well in the refrigerator for up to a week and freeze beautifully. They reheat to a fresh, warm state that’s almost as good as freshly baked. This makes them an ideal dessert for busy weeks or parties.
- Visual Appeal: The glossy finish and dark color make them Instagram‑ready, while the chocolate chips add a pop of texture. The brownies look as good as they taste, ensuring you’ll get compliments even before you take a bite. The aesthetic factor is a subtle but powerful advantage.
- Ingredient Quality: Using high‑quality dark cocoa and fresh black beans maximizes flavor and nutritional benefits. The beans should be drained and rinsed, not canned with added salt. This attention to detail elevates the entire experience.
Inside the Ingredient List
The Flavor Base
Black beans are the cornerstone of this recipe, providing a subtle earthiness that grounds the chocolate. When cooked and drained, they become silky, almost like a puree, which helps bind the batter together. If you skip the beans, you’ll lose that deep, savory undertone and the brownies will feel thin. I recommend using a can of high‑quality, low‑sodium beans for maximum flavor.
Cocoa powder is the heart of any brownie, delivering that unmistakable chocolate bite. I use a dark, unsweetened variety to keep the sweetness balanced. Too much cocoa can make the batter bitter; too little will make it bland. A light touch of espresso powder amplifies the chocolate, creating a richer, more complex flavor.
Vanilla extract adds a subtle warmth that rounds out the bean and chocolate flavors. It’s a classic ingredient that you can’t really do without in a brownie. If you’re vegan, a splash of almond or oat milk vanilla works just as well. The vanilla’s aromatic profile helps lift the other flavors.
The Texture Crew
All‑purpose flour gives the brownies structure, preventing them from falling apart. Use a light hand; too much flour will make them dry. I suggest sifting the flour to ensure an even distribution. If you prefer a gluten‑free version, swap for a blend of almond and oat flours.
Coconut oil is the secret to a moist, fudgy crumb. Its natural fats melt into the batter, creating a silky mouthfeel. I melt the oil before mixing to avoid a greasy texture. If you’re allergic to coconut, a neutral oil like grapeseed will work.
Almond milk adds moisture and a hint of nutty flavor. It also helps keep the batter from becoming too thick. I use unsweetened almond milk to avoid adding extra sugar. If you’re dairy‑free, oat milk is a great alternative.
The Unexpected Star
Espresso powder is a game‑changer, infusing the brownies with a subtle coffee kick that complements the chocolate. A teaspoon is enough to notice the difference; too much can overpower. I recommend using a fine‑grind espresso for a smoother finish. The espresso also enhances the beans’ earthiness.
Cayenne pepper adds a whisper of heat that keeps the brownies from feeling one‑dimensional. A pinch or 1/8 teaspoon is all you need to create a balanced flavor profile. If you’re sensitive to spice, you can omit it entirely. The pepper’s warmth gives the brownies a sophisticated edge.
The Final Flourish
Maple syrup is the natural sweetener that balances the bean’s earthiness and the cocoa’s bitterness. It also adds a subtle caramel note that deepens the overall flavor. I use a pure maple syrup to keep the taste clean. If you prefer a different sweetener, agave or honey works, but the flavor will shift slightly.
Dark chocolate chips are the final touch that gives the brownies a delightful melt‑in‑your‑mouth texture. They also add a glossy finish that looks irresistible. I choose semi‑dark chips for a slightly bitter finish. If you like milk chocolate, feel free to swap, but the flavor profile will change.
Cinnamon rounds out the flavor with a warm, spicy sweetness that complements the beans and chocolate. A half teaspoon is enough to notice the difference. If you’re not a fan of cinnamon, you can skip it; the brownies will still be fantastic. The cinnamon adds a comforting, familiar aroma.
Everything’s prepped? Good. Let’s get into the real action.
The Method — Step by Step
- Preheat and Prepare: Heat your oven to 350°F (175°C) and line a 9x9-inch pan with parchment paper. The parchment will keep the brownies from sticking and make cleanup a breeze. While the oven warms, gather all ingredients and set them on the counter. This step ensures you won’t be scrambling for missing items mid‑mix. The aroma of fresh ingredients will start to build anticipation.
- Blend the Beans: Place the drained black beans in a blender or food processor and pulse until smooth. The smoother the bean puree, the more cohesive the batter. If you’re short on time, a hand‑mash will suffice, but the blender creates a silkier texture. This puree acts as the base, providing moisture and binding. The result is a batter that feels almost like a mousse.
- Combine Wet Ingredients: In a separate bowl, whisk together the melted coconut oil, maple syrup, vanilla extract, and almond milk until fully emulsified. The mixture should look glossy and uniform. This step ensures the fats and liquids are evenly distributed, preventing clumps. The wet mix will also help the dry ingredients incorporate smoothly. A good whisking technique will save you from uneven brownies.
- Mix Dry Ingredients: Sift together the flour, cocoa powder, baking powder, salt, espresso powder, cayenne pepper, and cinnamon in a large bowl. Sifting eliminates clumps and ensures even distribution of leavening agents. The dry mix sets the stage for the batter’s rise and texture. Keep the dry ingredients at room temperature for best results. The aroma of cocoa will start to permeate the kitchen.
- Combine Wet and Dry: Pour the wet mixture into the dry mixture and stir gently until just combined. Avoid over‑mixing; the batter should be lumpy but cohesive. Over‑mixing will make the brownies tough. Use a spatula for a more delicate fold. The batter will look glossy and thick at this point.
- Add Chocolate Chips: Fold in the dark chocolate chips with a gentle motion. The chips will melt slightly in the heat, creating pockets of gooey chocolate. If you prefer a more uniform distribution, let the chips sit in the batter for a minute before folding. The chocolate adds a glossy finish and a burst of flavor. Be careful not to break the chips into too many pieces.
- Watch Out: The oven temperature can vary, so keep an eye on the edges. If they start to pull away, the brownies are done. I’ve had ovens that overcook the tops, so set a timer for 25 minutes and check at 20 minutes. The center should still be slightly gooey. This step is critical for that perfect fudgy texture.
- Bake: Slide the pan into the preheated oven and bake for 25–30 minutes. The brownies should rise and develop a dark crust. A toothpick inserted into the center will come out with a few moist crumbs. If it’s clean, the brownies are overcooked; if it’s wet, give them a few more minutes. The aroma at this point is irresistible.
- Cool and Serve: Remove the pan from the oven and let it cool on a wire rack for at least 15 minutes before slicing. The brownies will set and become easier to cut. Slice into squares and serve warm or at room temperature. For a decadent twist, top with a scoop of vanilla ice cream. The contrast between hot brownies and cold ice cream is pure bliss.
That's it — you did it. But hold on, I've got a few more tricks that'll take this to another level. Let’s dive deeper into the nuances that elevate these brownies from good to unforgettable.
Insider Tricks for Flawless Results
The Temperature Rule Nobody Follows
Most bakers bake brownies at 350°F, but lowering the temperature to 325°F gives a more even bake and prevents the edges from burning. I’ve baked at 325°F for 35 minutes and the center remains perfectly fudgy. The cooler temperature also allows the chocolate chips to melt evenly, creating a glossy surface. If you’re using a convection oven, reduce the temperature by 25°F. This subtle tweak ensures a consistent texture from edge to center.
Why Your Nose Knows Best
The smell of chocolate and beans is a powerful indicator of doneness. When the aroma is rich and buttery, the brownies are almost ready. I’ve learned to trust my nose; if it smells like fresh chocolate, it’s time to pull them out. This sensory cue is often more reliable than a timer, especially when ovens vary. Trusting your senses can save you from overbaking.
The 5‑Minute Rest That Changes Everything
After removing the brownies from the oven, let them rest for five minutes before cutting. This allows the heat to redistribute, preventing the center from cracking. The rest also lets the chocolate set, giving a cleaner slice. I’ve found that a short rest improves the overall mouthfeel. If you cut too early, the brownies can become gummy.
Keep the Pan Clean
Using parchment paper not only prevents sticking but also makes cleanup a breeze. I always line the pan with parchment before adding the batter. After baking, you can slide the parchment out and the brownies will release effortlessly. This step saves you from scrubbing the pan with soap and water. Clean pans also help maintain the pan’s longevity.
Use Fresh Beans
Freshly cooked beans are superior to canned ones because they have a lighter flavor and better texture. If you’re in a hurry, canned beans work, but rinse them thoroughly to remove excess sodium. The beans’ moisture content is critical for a fudgy brownie. I always use a can of low‑sodium beans to keep the flavor clean.
Let the Brownies Cool Completely
Cooling on a wire rack ensures even crumb structure. If you cut them while hot, the crumb can crumble and lose shape. I let them cool for at least 15 minutes before slicing. The brownies firm up, making them easier to serve. A fully cooled brownie also tastes better, with a deeper chocolate flavor.
Creative Twists and Variations
This recipe is a playground. Here are some of my favorite ways to switch things up:
Nutty Crunch
Add a cup of chopped walnuts or pecans to the batter before baking. The nuts will toast slightly, adding a crunchy texture that contrasts the fudgy interior. Pair it with a drizzle of honey for an extra sweet note. This version is perfect for holiday gatherings where you want something a little more festive.
Spiced Chili Brownies
Replace the cayenne with a pinch of smoked paprika for a smoky depth. Add a teaspoon of chili powder for a subtle heat that doesn’t overwhelm. The smoky flavor pairs beautifully with a scoop of chili chocolate ice cream. This twist is ideal for those who enjoy a bold, spicy dessert.
Mocha Madness
Swap the espresso powder for a tablespoon of instant coffee granules. This intensifies the coffee flavor and gives the brownies a mocha undertone. Finish with a dusting of cocoa powder on top. The result is a coffee lover’s dream that still feels like a brownie.
Almond Joy
Replace the dark chocolate chips with sweetened shredded coconut. Add a handful of almonds for crunch. Drizzle with melted white chocolate after baking for a sweet, tropical finish. This version is reminiscent of the classic candy bar and is a hit with kids.
Vegan Delight
Use coconut oil, almond milk, and maple syrup to keep the recipe dairy‑free. Replace the eggs with a flaxseed egg (1 tablespoon flaxseed meal + 3 tablespoons water). This version is fully plant‑based and still delivers a moist, rich brownie.
Chocolate Ganache Swirl
After baking, spoon a swirl of dark chocolate ganache over the top and let it set. The ganache adds a glossy finish and a rich chocolate layer. Sprinkle sea salt on top for a salty‑sweet contrast. This is the ultimate indulgence for a special occasion.
Storing and Bringing It Back to Life
Fridge Storage
Store brownies in an airtight container at room temperature for up to 5 days. The airtight seal prevents moisture loss, keeping them fresh. If you’re storing them in the fridge, let them reach room temperature before serving to avoid a soggy texture. I recommend using a silicone mold for easy portioning.
Freezer Friendly
Wrap each brownie tightly in plastic wrap, then place them in a freezer bag. They can be frozen for up to 3 months. When you’re ready to enjoy, pop one out and let it thaw at room temperature for 30 minutes. Freezing preserves the flavor and texture, so the brownies taste as good as fresh.
Best Reheating Method
Microwave the brownies on a low power setting for 15–20 seconds to warm them. The gentle heat reactivates the cocoa without drying them out. If you prefer a crispier surface, place them in a preheated oven at 300°F for 5 minutes. Add a splash of water before reheating to keep the interior moist; it steams back to perfection.