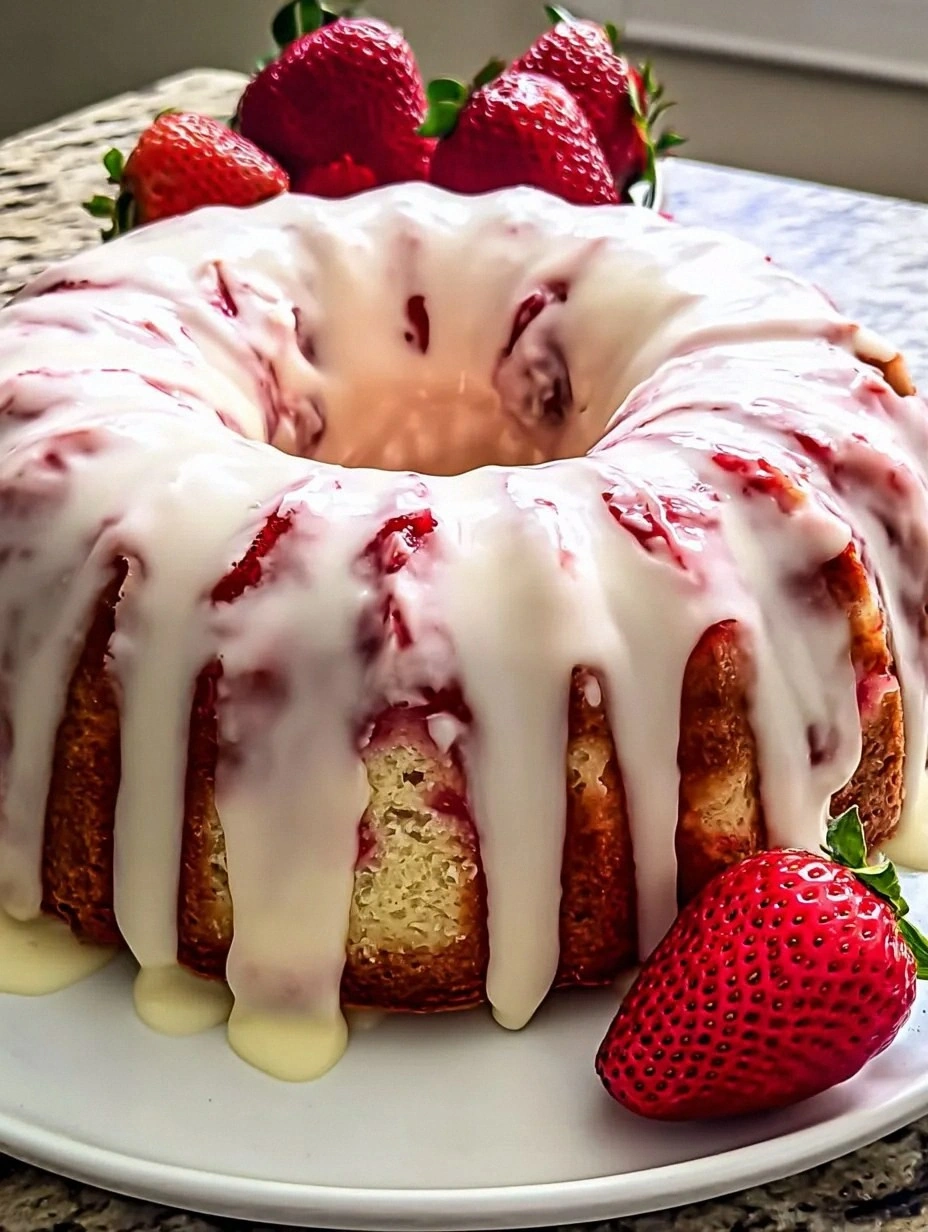
I still remember the first time I attempted to make cheesecake truffles. It was a disaster of epic proportions. Picture this: cream cheese melting on my counter like a sad snowman, chocolate that seized up faster than my laptop during a Zoom call, and raspberries that looked like they'd been through a blender tornado. My kitchen looked like a crime scene from a dessert-themed horror movie. But here's the thing — that colossal failure led me to develop what I now consider the holy grail of raspberry cheesecake truffles. After seventeen iterations, countless taste tests (my neighbors still talk about the "truffle summer of 2023"), and one slightly traumatized food processor, I've cracked the code.
These aren't your average chocolate-covered cream cheese blobs that taste like disappointment and broken dreams. No, these are the kind of truffles that make people close their eyes and sway slightly when they bite into them. The kind that disappear from party platters faster than free wine at a book club meeting. The secret lies in the perfect balance of tangy cream cheese, real whipped topping (none of that artificial stuff), and fresh raspberries that burst with summer sunshine even in the dead of winter. The graham cracker crumbs don't just sit there looking pretty — they provide that essential cheesecake authenticity that makes your brain go, "Oh yes, this is exactly what I wanted."
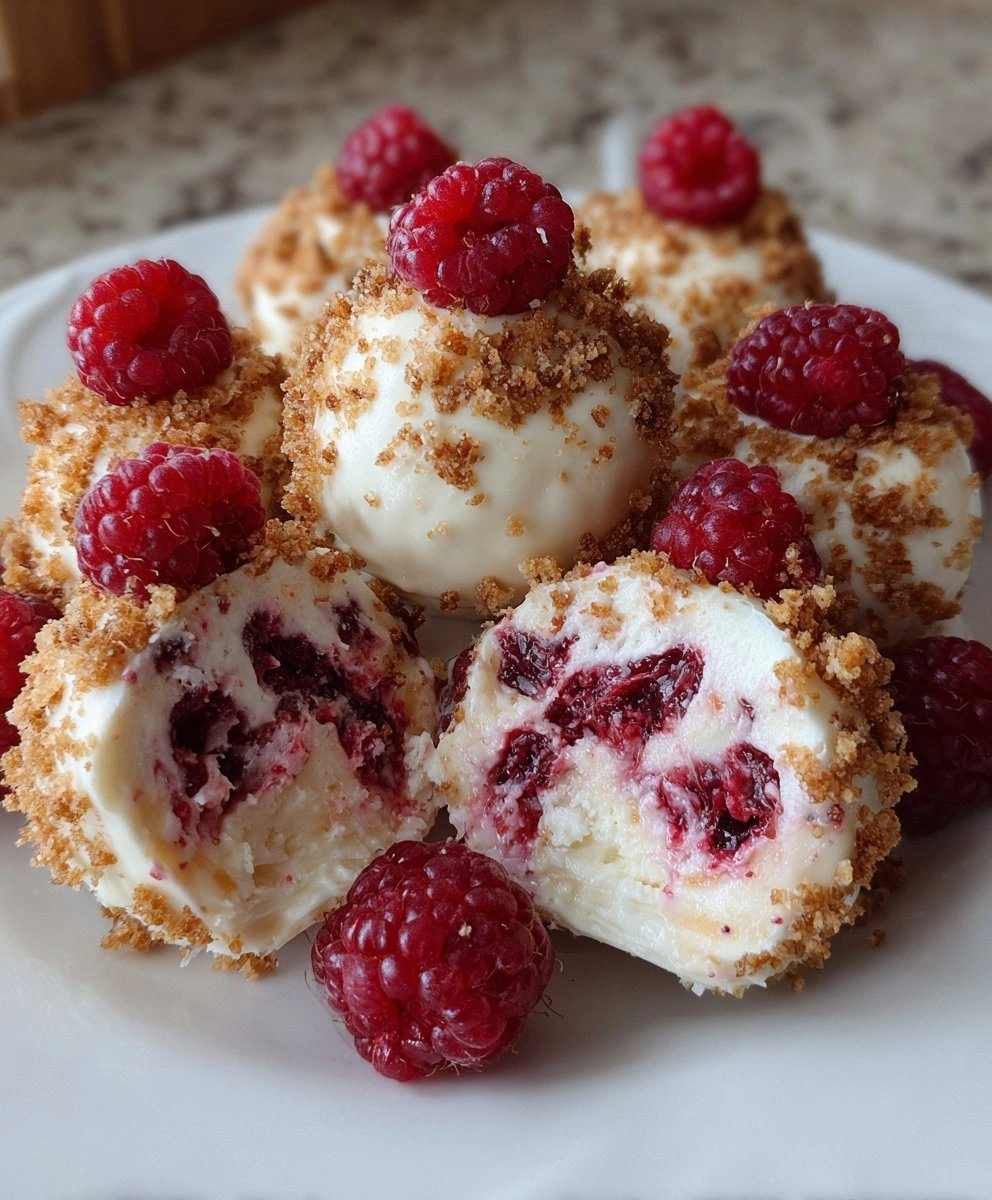
What really sets these apart is the texture game. We're talking about a center so silky smooth it makes regular cheesecake feel like it's got commitment issues. The chocolate coating? It's not just a shell — it's a perfectly tempered armor that cracks with the most satisfying snap, revealing the cloud-like filling within. And here's where it gets interesting: most recipes tell you to freeze the centers before dipping, but that creates condensation that makes your chocolate separate like an awkward middle school dance. We're doing something completely different that results in truffle perfection.
I'll be honest with you — I ate half the batch before anyone else got to try them. My excuse was "quality control," but really, I was having a moment with these truffles. The way the raspberry bits create these little jewel-like pockets of flavor, the way the cream cheese filling literally melts on your tongue, the way the graham cracker crumbs add just enough crunch to keep things interesting — it's all dangerously addictive. Picture yourself pulling these out of the fridge, the chocolate just starting to develop that subtle bloom, the raspberries peeking through like hidden treasures. Let me walk you through every single step — by the end, you'll wonder how you ever made it any other way.
What Makes This Version Stand Out
Silky Smooth: We're achieving a texture that's lighter than traditional cheesecake but richer than mousse by folding in whipped topping at just the right temperature. It's like eating a raspberry-scented cloud that's been to finishing school. The cream cheese gets brought to room temperature gradually, preventing those annoying little lumps that ruin the mouthfeel.
Real Raspberry Power: Instead of using raspberry extract or jam, we're incorporating fresh berries in two ways — some get folded into the mixture whole for bursts of flavor, others get gently crushed to distribute their essence throughout every bite. This creates a more complex, authentic raspberry experience that tastes like you just picked them from the garden.
Chocolate That Behaves: Most home cooks struggle with chocolate that blooms, cracks, or turns into a greasy mess. Our method involves a specific temperature range and a secret ingredient that keeps your chocolate glossy and snappy without needing a culinary degree. The result is professional-looking truffles that wouldn't be out of place in a Parisian chocolaterie.
No-Bake Brilliance: While traditional cheesecake requires precise baking and water baths, these truffles deliver all the flavor without turning on your oven. Perfect for summer entertaining when the last thing you want is more heat in your kitchen. Plus, kids can help with the rolling and coating without any safety concerns.
Crowd-Pleasing Size: Each truffle is exactly two bites — enough to satisfy your cheesecake craving without the commitment of a whole slice. They're like the dating app version of cheesecake: all the pleasure, none of the obligation. Party guests can sample multiple flavors without feeling overwhelmed.
Make-Ahead Magic: These actually improve after a day in the fridge, making them perfect for entertaining. The flavors meld and deepen, while the texture becomes even more luxurious. You can prepare them up to five days in advance, which means less stress when you're hosting.
Texture Symphony: We're not just throwing ingredients together — we're creating layers. The smooth filling, the juicy raspberry bursts, the crunchy graham cracker coating, and the snappy chocolate shell all work together like a well-rehearsed orchestra. Each element has its moment to shine.
Alright, let's break down exactly what goes into this masterpiece...
Inside the Ingredient List
The Flavor Base
Cream cheese is the undeniable star here, but not all cream cheese is created equal. I'm loyal to the full-fat, brick-style variety — none of that whipped stuff in a tub. The brick style has less air incorporated, which means denser, richer truffles. When you're shopping, look for packages that feel firm and have at least a month until expiration. Older cream cheese can develop a slightly sour taste that'll throw off your whole flavor profile. And here's something most recipes won't tell you: if your cream cheese has been sitting in the fridge for more than two weeks, it's already started to break down and won't achieve that silky texture we're after.
Powdered sugar might seem straightforward, but it's doing more than just sweetening the deal. Its ultra-fine texture means no graininess, and the small amount of cornstarch it contains actually helps stabilize our filling. Don't even think about substituting granulated sugar here — you'll end up with tiny sugar crystals that feel like sand between your teeth. I always sift my powdered sugar, even though it comes pre-sifted. There's always that one stubborn lump that wants to ruin your smooth filling, and we're not taking any chances.
Vanilla extract is where I get a little snobby. Pure vanilla extract, not the imitation stuff that tastes like a candle store. The real deal adds these complex, almost smoky undertones that make people ask, "What is that amazing flavor?" It's like the bass line in a great song — you might not consciously notice it, but you'd definitely miss it if it wasn't there. If you're feeling fancy, vanilla bean paste works beautifully too, leaving those gorgeous little specks throughout your truffles.
The Texture Crew
Whipped topping is our secret weapon for achieving that cloud-like texture. But here's where it gets controversial — I'm talking about the frozen whipped topping that comes in a tub, not fresh whipped cream. Before you food snobs come for me, hear me out. The stabilizers in commercial whipped topping prevent weeping and maintain that fluffy texture even after freezing and thawing. Fresh whipped cream would collapse into a sad, watery mess. Let the topping thaw completely in the fridge, then give it a gentle fold to restore its fluffiness before incorporating it.
Graham cracker crumbs provide that essential cheesecake authenticity, but we're not just dumping them in whole. First, we pulse them in a food processor until they're the texture of beach sand — not powder, not chunks, but that perfect in-between that adds crunch without being gritty. The crumbs serve triple duty: they flavor the filling, coat the outside for visual appeal, and provide textural contrast. Pro tip: cinnamon graham crackers add an extra dimension, but honey ones keep things classic.
The Unexpected Star
Fresh raspberries are where this recipe transforms from good to unforgettable. Frozen berries will work in a pinch, but they release too much juice and turn your filling pink and weepy. When selecting raspberries, look for plump, dry berries that are fragrant but not mushy. The secret is using them in two ways: some get folded in whole for those explosive flavor bursts, others get gently crushed to distribute their essence throughout. This dual approach ensures every bite has raspberry flavor, but only some bites have the actual fruit.
The timing of adding raspberries is crucial. Fold them in when the cream cheese mixture is slightly cooler than room temperature — warm enough to incorporate easily, but cool enough that the berries don't start bleeding their color everywhere. Think of it like adding chocolate chips to cookie dough. You want distribution without smashing.
The Final Flourish
Semi-sweet baking chocolate isn't just a coating — it's a flavor component that needs to complement, not compete with, our raspberry cheesecake filling. Look for chocolate that's around 60% cacao for the perfect balance of sweetness and depth. Anything darker overwhelms the delicate raspberry, anything lighter tastes like candy. The quality of your chocolate directly impacts the final result, so this isn't the place to cheap out. That said, you don't need to remortgage your house — mid-range baking chocolate works beautifully.
Everything's prepped? Good. Let's get into the real action...
The Method — Step by Step
- Start with your cream cheese — and I cannot stress this enough — it needs to be at that perfect temperature where it's pliable but not melting. Cut it into 1-inch cubes and let it sit on your counter for exactly 30 minutes. This isn't the time for shortcuts. Microwaving creates hot spots that will haunt you later. While you're waiting, line a baking sheet with parchment paper and clear some space in your fridge. Trust me, you'll need it.
- In your stand mixer (or with a hand mixer if you're feeling ambitious), beat the cream cheese on medium speed for a full two minutes. This isn't just mixing — it's aerating. You're looking for a texture that's lighter than when you started, with visible whipping on the surface. Scrape down the bowl religiously every 30 seconds. Those unmixed chunks hiding at the bottom are truffle saboteurs, and we're not having it.
- Add the powdered sugar gradually, about 1/4 cup at a time, mixing on low speed. This prevents the sugar from creating a mushroom cloud in your kitchen. Once incorporated, bump up to medium speed for 30 seconds. The mixture should be smooth and glossy, like silk that's been whipped by angels. If you see any lumps, keep mixing. Patience is your friend here.
- Now for the vanilla — add it and mix just until combined. Overmixing here can cause the cream cheese to break down and become runny. You're looking for incorporation, not transformation. The mixture should smell like vanilla ice cream's sophisticated cousin.
- Time for the whipped topping. Here's the crucial part: fold, don't mix. Use a rubber spatula and cut down through the center, then sweep around the sides and lift up. Rotate the bowl a quarter turn and repeat. This preserves the air bubbles that give our truffles their ethereal texture. It should take about 12 folds total — any more and you're deflating your hard work.
- Prepare your raspberries. Take about two-thirds of them and gently crush them with your fingers — just enough to break them open but not turn them into jam. The remaining berries stay whole for those gorgeous pops of flavor. Fold the raspberries in using the same gentle technique. The mixture should look like a raspberry ripple ice cream with visible fruit throughout.
- Add the graham cracker crumbs and fold just until you see streaks of crumbs running through. Don't overmix or they'll disappear completely. The goal is pockets of crunch, not homogeneous distribution. Cover the bowl with plastic wrap and refrigerate for at least 2 hours, or up to overnight. This chilling step is non-negotiable — it's what transforms our soft mixture into something you can actually shape.
- Remove the chilled mixture from the fridge. It should be firm but scoopable. Use a small cookie scoop or melon baller to portion out 1-inch balls. Work quickly — the warmth from your hands will start softening the mixture. Roll each portion between your palms using gentle pressure. If the mixture starts sticking, dust your hands with a tiny bit of powdered sugar. Place the rolled truffles on a parchment-lined baking sheet.
- Now for the chocolate coating. Melt your chocolate in a double boiler or microwave in 30-second bursts, stirring between each burst. The chocolate should be smooth and glossy, with no lumps. Let it cool slightly — it should feel warm but not hot on your wrist. This is crucial: chocolate that's too hot will melt your truffle centers, too cool and it won't coat smoothly.
- Working with one truffle at a time, drop it into the melted chocolate. Use a fork to roll it around until completely coated, then lift it out, letting excess chocolate drip off. Gently slide it off the fork onto parchment paper. While the chocolate is still wet, sprinkle a few graham cracker crumbs on top for that authentic cheesecake look. Repeat with remaining truffles.
- Let the truffles set at room temperature for about 30 minutes, then transfer to the refrigerator to firm up completely. This two-stage setting prevents the chocolate from developing that white, streaky bloom. Once set, these beauties will keep in an airtight container in the fridge for up to 5 days, though I guarantee they won't last that long.
That's it — you did it. But hold on, I've got a few more tricks that'll take this to another level...
Insider Tricks for Flawless Results
The Temperature Rule Nobody Follows
Here's the thing about temperature — it's not just about the cream cheese. Every single component needs to be at the right temp for this to work. Your mixing bowl should be room temperature, not cold from the dishwasher. Your spatula should be room temperature. Even your graham cracker crumbs should be room temperature. Cold utensils will cause the cream cheese to seize up and create lumps that no amount of mixing will fix. I learned this the hard way when I made a batch with a cold metal bowl and ended up with truffles that looked like they had cottage cheese mixed in.
The chocolate temperature is equally crucial. Too hot and it'll create a thermal shock that cracks as it cools. Too cool and it'll be thick and gloppy, creating those sad, lumpy truffles that look like they've been through trauma. Aim for chocolate that feels like a warm bath — comfortable to touch but not hot. And here's a pro tip: if you're making these in summer, crank up your air conditioning. A warm kitchen is the enemy of chocolate work.
Why Your Nose Knows Best
Smell is your most underutilized tool in the kitchen, and these truffles are the perfect example. When your cream cheese mixture is properly combined, it should smell like vanilla ice cream with a hint of berry. If you still smell raw cream cheese, keep mixing. When your chocolate is properly melted, it should smell intensely chocolatey and slightly sweet. If it smells sharp or bitter, it's overheated and you'll need to start over. I've saved countless batches just by trusting my nose.
The raspberries tell their story through scent too. Fresh, perfect berries smell like summer morning dew. If they smell sour or fermented, they'll make your truffles taste like regret. And here's something wild: if your finished truffles smell like refrigerator, wrap them in plastic wrap with a piece of bread overnight. The bread absorbs odors and your truffles will taste fresh again.
The 5-Minute Rest That Changes Everything
After you mix your cream cheese base, walk away. Seriously. Cover it and let it sit for five minutes. This brief rest allows the graham cracker crumbs to hydrate slightly, which prevents them from being crunchy little rocks in your smooth filling. It also lets the flavors meld in a way that immediate chilling doesn't achieve. I discovered this by accident when I got distracted by a phone call, and the batch I made with the rested base was noticeably more complex and cohesive.
The same principle applies to your rolled truffles. After shaping them, let them sit at room temperature for five minutes before chilling. This allows the surface to dry slightly, which helps the chocolate adhere better. If you go straight from rolling to dipping, condensation will form and your chocolate will slide right off. It's like trying to paint on a wet wall — technically possible, but you're fighting physics the whole way.
Creative Twists and Variations
This recipe is a playground. Here are some of my favorite ways to switch things up:
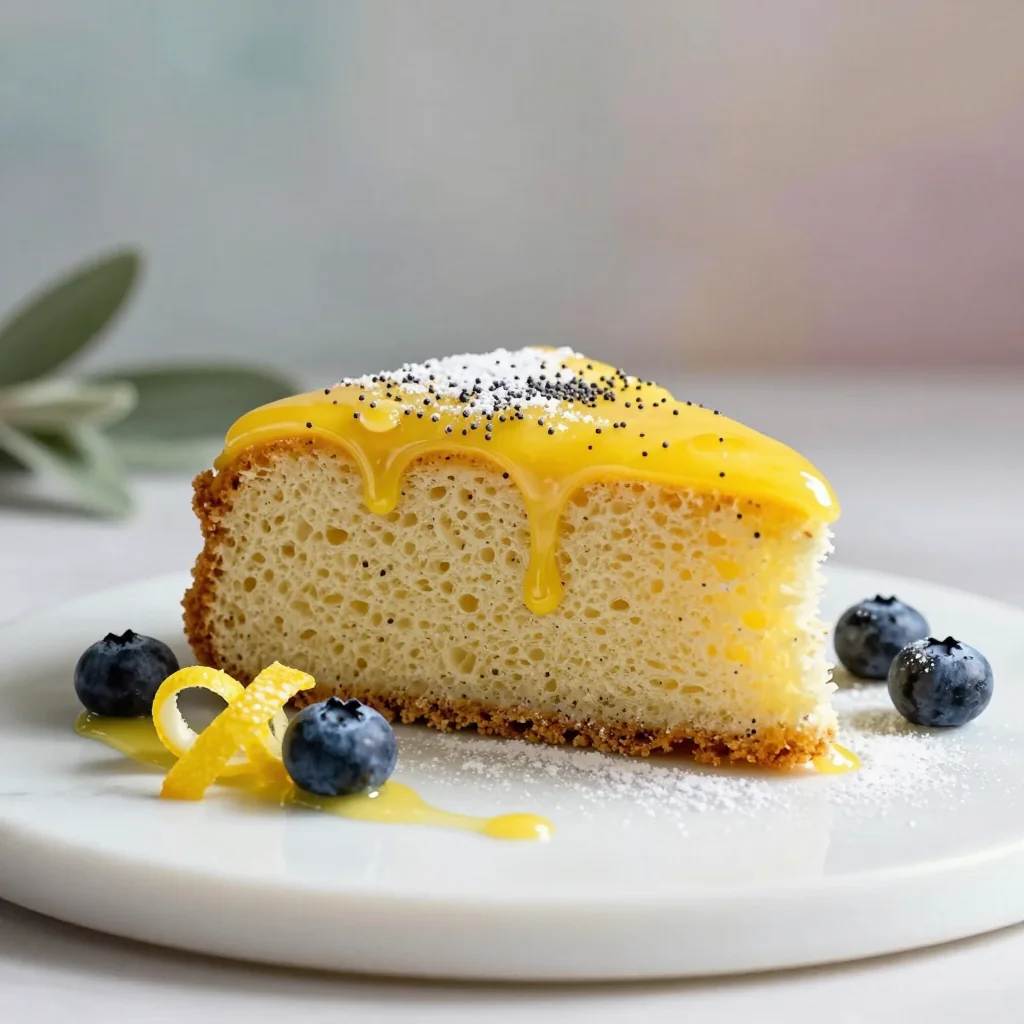
Lemon Blueberry Cheesecake Truffles
Swap the raspberries for fresh blueberries and add a teaspoon of lemon zest to the cream cheese mixture. The lemon brightens everything up and makes these taste like summer in truffle form. Use Golden Grahams instead of regular graham crackers for a more complex flavor. Coat in white chocolate and sprinkle with yellow sanding sugar for a sunshine effect that'll make people smile before they even bite in.
Salted Caramel Apple Truffles
Replace raspberries with tiny diced apples that you've sautéed in butter and cinnamon until just soft. Add a tablespoon of caramel sauce to the cream cheese mixture and use crushed vanilla wafers instead of graham crackers. Dip in milk chocolate and immediately sprinkle with flaky sea salt. These taste like fall harvest festivals and cozy sweaters.
Mocha Hazelnut Truffles
Dissolve a teaspoon of instant espresso powder in the vanilla before adding it to the cream cheese. Use crushed chocolate wafer cookies instead of graham crackers and fold in chopped toasted hazelnuts with the raspberries left out entirely. Coat in dark chocolate and dust with cocoa powder mixed with a pinch of espresso powder. These are for the coffee addicts who need their dessert to multitask.
Coconut Key Lime Truffles
Replace the vanilla with key lime juice and add a tablespoon of lime zest to the mixture. Use crushed coconut cookies instead of graham crackers and fold in toasted coconut flakes. Dip in white chocolate tinted with a drop of green food coloring and sprinkle with more toasted coconut. They taste like a tropical vacation in truffle form.
Pumpkin Spice Truffles
Perfect for fall, add 1/4 cup of pumpkin puree and a teaspoon of pumpkin pie spice to the cream cheese mixture. Use gingersnap crumbs instead of graham crackers and fold in dried cranberries for texture. Coat in white chocolate and dust with cinnamon. These disappear faster than pumpkin spice lattes in October.
Chocolate Cherry Truffles
Replace raspberries with chopped dried cherries that you've soaked in kirsch or cherry juice. Add a tablespoon of cocoa powder to the cream cheese mixture and use chocolate graham crackers. Dip in dark chocolate and top with a candied cherry. These taste like Black Forest cake in truffle form and are absolutely irresistible to chocolate lovers.
Storing and Bringing It Back to Life
Fridge Storage
These truffles are divas when it comes to storage. They need an airtight container, but not just any container will do. Line the bottom with parchment paper, arrange the truffles in a single layer, then cover with more parchment before sealing. This prevents them from absorbing refrigerator odors while protecting the chocolate from condensation. Store them in the warmest part of your fridge — usually the door — where the temperature is most stable. They'll keep for up to 5 days, though I've never seen them last more than 2.
If your truffles develop a slight white film (called bloom), don't panic. It's just the cocoa butter rising to the surface and while it affects appearance, it doesn't hurt the taste. To minimize bloom, let the truffles come to room temperature in their sealed container before opening. The gradual temperature change prevents condensation from forming on the chocolate.
Freezer Friendly
Here's the beautiful thing — these truffles freeze like a dream. Arrange them in a single layer on a parchment-lined baking sheet and freeze until solid, about 2 hours. Then transfer to a freezer-safe container with parchment between layers. They'll keep for up to 2 months, though I question the willpower of anyone who can resist them that long. When you're ready to serve, transfer to the fridge overnight. Never thaw at room temperature or the chocolate will sweat and become sticky.
The texture after freezing is actually slightly firmer, which some people prefer. The flavors become more concentrated, and the chocolate coating develops an even better snap. If you're planning to freeze them, consider under-dipping slightly so the chocolate doesn't become too thick after freezing.
Best Reheating Method
Okay, technically you shouldn't reheat truffles, but sometimes they get too cold in the fridge and need to warm up slightly for optimal texture. The key is patience. Transfer them from the fridge to the counter and let them sit for 15-20 minutes. They should feel cool but not cold when you pick them up. If you're in a rush, hold one between your palms for 30 seconds — body temperature is perfect for bringing out the flavors without melting the chocolate.
If your chocolate has bloomed and you want to restore its appearance, you can gently warm it with a hair dryer on the lowest setting, held 12 inches away. Move constantly and stop as soon as the chocolate starts to look shiny. Let it set at room temperature. This won't fix severe bloom, but it helps with light cases.