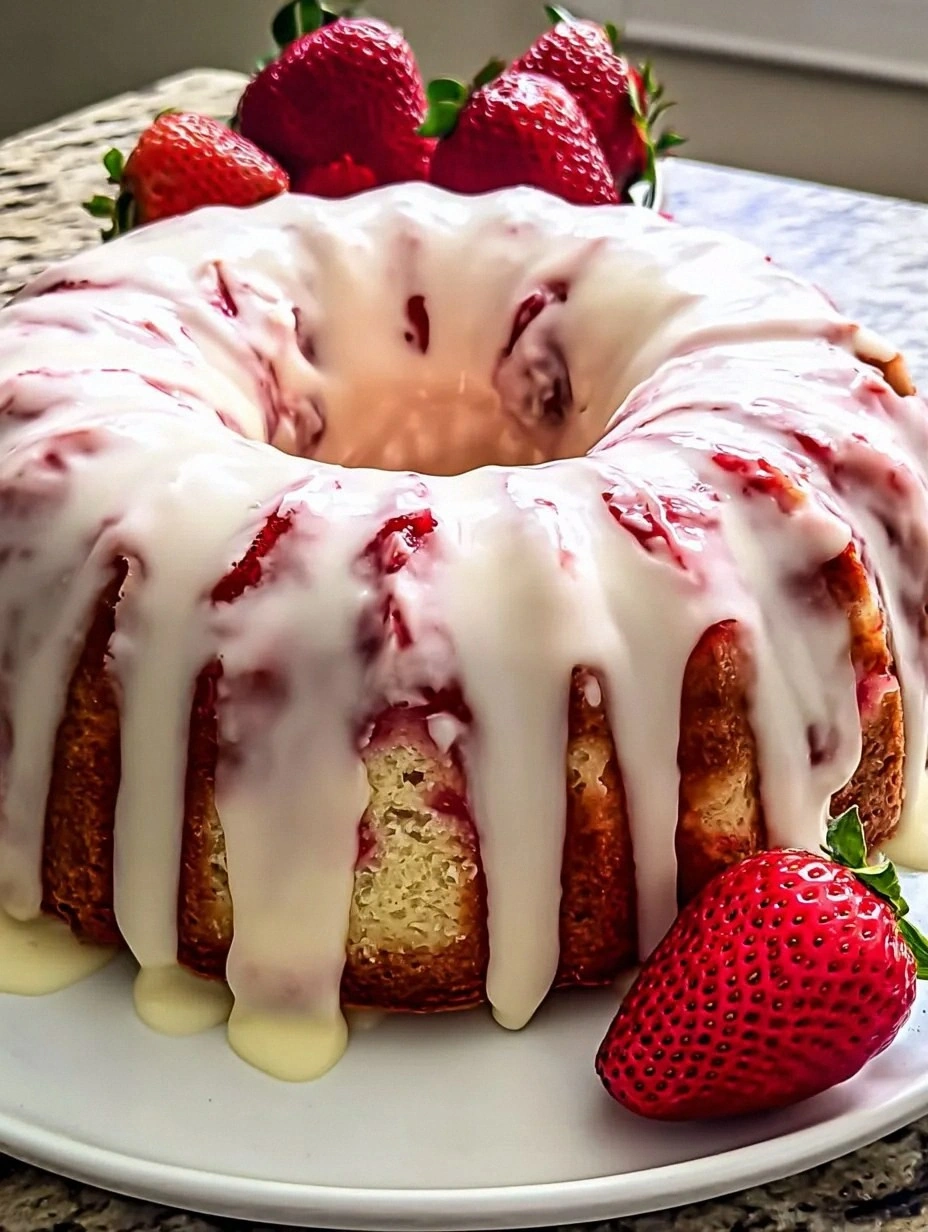
Picture this: I’m in my tiny kitchen, the oven humming like a lazy cat, and I’ve just realized I’m out of the usual chocolate cake mix that my family swears by. Panic? Absolutely. But then a daring friend texts me, “Make something with strawberries, and make it unforgettable.” I laughed, grabbed the last handful of fresh berries from the fridge, and thought, “Why not turn this into a strawberry‑cream‑cheese pound cake that will make everyone question every other dessert they’ve ever had?” That moment of desperation turned into the most glorious culinary epiphany of my life, and I’m still buzzing from the memory of that first bite.
The kitchen was a symphony of sounds: the whir of the stand mixer, the gentle clink of the mixing bowl against the countertop, and the soft sigh of the oven door closing. The air filled with the buttery aroma of softened butter melting into cream cheese, a scent so rich it made my nose do a little happy dance. When I folded in the fresh strawberry puree, the pink hue spread like sunrise across the batter, and the sweet‑tart perfume hit my nostrils like a promise. The texture? Silky, almost buttery, with a hint of tang that made my tongue tingle in anticipation.
Most pound cake recipes either drown in butter or become dry as old toast. This version, however, balances the dense, buttery crumb you love with the light, airy lift you crave, thanks to a secret technique I’m about to spill. I’m talking about a double‑cream‑cheese method that keeps the crumb moist for days, and a strawberry glaze that sets like a glossy mirror, catching the light and your eye. It’s the kind of cake that makes you pause, stare, and then dive in without a second thought. I dare you to taste this and not go back for seconds.
And here’s the kicker: I’m going to reveal a tiny ingredient swap that most bakers overlook—a splash of sour cream that adds a subtle tang and keeps the crumb from turning into a brick. It’s the game‑changer that will make your friends say, “This is hands down the best version you’ll ever make at home.” Okay, ready for the game‑changer? Let me walk you through every single step — by the end, you’ll wonder how you ever made it any other way.
What Makes This Version Stand Out
- Flavor Fusion: The marriage of sweet strawberries with tangy cream cheese creates a depth that sings louder than any single‑note cake.
- Moisture Mastery: The addition of sour cream and a double‑cream‑cheese fold guarantees a crumb that stays buttery for up to three days.
- Simplicity: Despite its gourmet vibe, the recipe uses pantry staples and needs only one bowl for the batter.
- Visual Wow: The glossy strawberry glaze turns a humble pound cake into a centerpiece worthy of any celebration.
- Crowd‑Pleaser: Even the pickiest eaters can’t resist the sweet‑tart balance, making it perfect for brunches, birthdays, or just a “treat‑yourself” moment.
- Ingredient Quality: Using real butter, full‑fat cream cheese, and fresh strawberries elevates the entire experience.
- Cooking Method: Baking at a lower temperature for a longer time prevents the dreaded dry edges and yields an even rise.
- Make‑Ahead Potential: This cake freezes beautifully, and the glaze can be stored separately for a quick finish later.
Alright, let's break down exactly what goes into this masterpiece...
Inside the Ingredient List
The Flavor Base
Fresh Strawberries (1 cup pureed): They provide the bright, natural sweetness and a subtle acidity that cuts through the richness of the cream cheese. If you skip them, you’ll lose that signature pink hue and the fresh flavor that makes this cake unforgettable. For the best results, choose berries that are deep red and fragrant; a quick sniff should smell like sunshine. If strawberries aren’t in season, frozen berries work just as well—just thaw and drain excess liquid.
The Texture Crew
Unsalted Butter (1 cup, softened): Butter is the backbone of any pound cake, giving it that dense, melt‑in‑your‑mouth quality. Using unsalted lets you control the salt level precisely. If you accidentally grab salted butter, reduce the added salt by half to keep the balance. When butter is at room temperature, it creams faster and traps more air, which is essential for that tender crumb.
Cream Cheese (8 oz, softened): This is the secret weapon. It adds a tangy richness that keeps the cake from feeling like a butter slab. Skipping it turns the cake into a plain butter pound cake—good, but not legendary. For a lighter version, you can substitute half the cream cheese with Greek yogurt, but expect a slightly different texture.
The Unexpected Star
Sour Cream (½ cup): A tiny dollop of sour cream adds moisture and a faint tang that brightens the overall flavor profile. Without it, the crumb can become a bit dry after a day or two. If you’re dairy‑free, swap with coconut yogurt; the flavor will shift, but the moisture stays.
The Final Flourish
Powdered Sugar (1 cup) & Lemon Juice (1 tbsp) for Glaze: Together they create a glossy, sweet‑tart glaze that sets like a mirror. Skipping the lemon juice makes the glaze cloying; the acidity balances the sweetness and helps the glaze set faster. If you prefer a deeper flavor, replace lemon juice with a splash of orange liqueur.
Everything's prepped? Good. Let's get into the real action...
The Method — Step by Step
Preheat your oven to 325°F (165°C) and grease a 9‑inch loaf pan with butter, then line it with parchment paper for an easy release. This lower temperature is the secret to a uniform rise and prevents the edges from turning into a crunchy crust before the center is cooked. As the oven warms, you’ll hear a gentle hum that feels like a promise of baked perfection. Let the pan sit while you prep the batter; the anticipation builds, and trust me, that waiting game is worth it.
Kitchen Hack: Place the loaf pan on a baking sheet; this prevents any accidental spills from scorching the oven floor.In a large mixing bowl, combine the softened butter, cream cheese, and granulated sugar. Using a hand mixer on medium speed, beat until the mixture is pale, fluffy, and smells like a bakery—about 3‑4 minutes. This aeration step is crucial; it traps air that will later expand, giving the cake its tender crumb. If the mixture looks curdled, keep mixing; the sugar will eventually bring everything together into a smooth, glossy batter.
Add the eggs one at a time, beating well after each addition. The batter should thicken slightly with each egg, creating a ribbon‑like swirl when you lift the beaters. This is the moment of truth: if the batter looks too thin, you’ve either over‑mixed or added too many eggs. Trust your eyes and the texture—smooth but not runny.
Watch Out: Over‑mixing after the eggs are added can develop gluten, leading to a tough cake. Stop mixing as soon as everything is just combined.Stir in the vanilla extract, sour cream, and a pinch of salt. The sour cream adds moisture, while the vanilla rounds out the flavor profile. At this stage, the batter should look thick and slightly glossy—perfect for the next step.
In a separate bowl, whisk together the flour, baking powder, and baking soda. Gently fold the dry ingredients into the wet batter using a rubber spatula. This folding motion should be slow and deliberate; think of it as coaxing the flour into the batter without punching out the air you just created. The batter will look a bit lumpy—that’s okay. Over‑mixing here is the most common mistake that leads to a dense, heavy cake.
Now, pour the batter into the prepared loaf pan, smoothing the top with a spatula. The batter should spread evenly, leaving a small gap at the edges to allow for expansion. Once in the pan, give it a gentle tap on the counter to release any large air bubbles that might have formed.
Slide the pan into the oven and bake for 30‑35 minutes, or until a toothpick inserted into the center comes out clean with just a few crumbs attached. Around the 20‑minute mark, you’ll notice the edges pulling slightly away from the pan—a visual cue that the cake is setting. The aroma at this point is intoxicating: buttery, slightly caramelized, with a whisper of strawberry from the puree you added earlier.
Kitchen Hack: Rotate the pan halfway through baking for an even golden top.While the cake cools in the pan for 10 minutes, prepare the glaze. In a small saucepan, combine the powdered sugar, fresh strawberry puree, and lemon juice. Heat over low heat, stirring constantly, until the mixture is smooth and glossy—about 2‑3 minutes. The glaze should have the consistency of a thick syrup; if it’s too runny, add a touch more powdered sugar, and if too thick, a few drops of water or extra lemon juice will loosen it.
After the cake has rested, turn it out onto a cooling rack. While it’s still warm, drizzle the strawberry glaze over the top, allowing it to cascade down the sides like a sweet waterfall. Let the glaze set for about 15 minutes; it will firm up into a shiny, slightly tacky coating that adds both visual flair and a burst of fresh strawberry flavor with every bite. Finally, slice, serve, and watch your guests’ faces light up. That sizzle when the glaze hits the warm cake? Absolute perfection.
That's it — you did it. But hold on, I've got a few more tricks that'll take this to another level...
Insider Tricks for Flawless Results
The Temperature Rule Nobody Follows
Never bake a pound cake at a scorching 350°F unless you’re in a rush. The lower 325°F temp gives the batter time to rise evenly, preventing the dreaded “crusty edge, soggy middle” scenario. I once cranked the heat to 375°F to shave five minutes off the bake time, and the result was a rubbery perimeter that no amount of frosting could fix. Keep the oven door closed—every peek drops the temperature by a few degrees, extending the bake and possibly causing uneven rise.
Why Your Nose Knows Best
When the cake is about 20 minutes in, start sniffing. A sweet, buttery aroma signals that the crumb is setting, while a faint caramel note warns you that the top might be browning too fast. Trust that nose; it’s more reliable than a timer. If you detect a caramel scent early, loosely tent the cake with foil to prevent over‑browning while the interior finishes cooking.
The 5‑Minute Rest That Changes Everything
After removing the cake from the oven, let it rest in the pan for exactly five minutes before turning it out. This short pause lets the steam redistribute, preventing the cake from collapsing or cracking when you invert it. Skipping this step is like pulling a fresh‑baked cookie off a sheet too early—it crumbles and loses its shape.
Glaze Temperature Matters
Warm glaze adheres better than cold. If you pour a chilled glaze over a hot cake, it will set too quickly, creating a dull, uneven surface. Heat the glaze just enough to become fluid, then drizzle. The result is a mirror‑like finish that catches light—and compliments—like a pro.
Storage Savior
Wrap the cooled cake tightly in plastic wrap before storing; this locks in moisture and prevents the glaze from drying out. When you’re ready to serve, let it sit at room temperature for 15 minutes; the glaze will soften just enough to become luscious again. I once tried reheating the whole cake in the microwave—big mistake. The glaze turned rubbery, and the crumb became gummy. Patience is the secret ingredient.
Creative Twists and Variations
This recipe is a playground. Here are some of my favorite ways to switch things up:
Lemon‑Blueberry Burst
Swap the strawberry puree for a blend of fresh blueberries and lemon zest. The tartness of the lemon pairs beautifully with the sweet berries, creating a summer‑ready flavor that’s perfect for brunch. Use the same glaze ratio, just replace the strawberries with blueberries.
Chocolate Swirl Delight
Fold in ¼ cup melted dark chocolate into the batter just before pouring it into the pan, then use a skewer to swirl it through. The result is a marble‑like cake where chocolate ribbons dance through the creamy crumb. Pair with a simple powdered‑sugar dusting instead of the strawberry glaze.
Almond‑Orange Elegance
Replace half the all‑purpose flour with almond flour and add 1 tsp orange zest to the batter. The almond flour adds a nutty depth, while the orange zest brings a bright citrus note that lifts the richness. Top with an orange‑infused glaze for a sophisticated twist.
Coconut‑Pineapple Paradise
Mix in ½ cup shredded coconut and replace the strawberry glaze with a pineapple glaze (pineapple juice, powdered sugar, and a splash of rum). This tropical version transports you straight to a beachside cabana, and the coconut adds a pleasant chew.
Spiced Autumn Version
For a cozy, fall‑friendly cake, add 1 tsp ground cinnamon and a pinch of nutmeg to the batter, and swap the strawberry glaze for a maple‑brown sugar glaze. The warm spices complement the cream cheese beautifully, making it a perfect holiday treat.
Storing and Bringing It Back to Life
Fridge Storage
Place the cooled, glazed cake in an airtight cake dome or wrap tightly in plastic wrap. It will stay fresh for up to five days. The glaze may become a bit firm, but a quick room‑temperature sit will soften it back to its glossy glory.
Freezer Friendly
Wrap each slice individually in parchment paper, then seal the whole stack in a freezer‑safe zip‑top bag. Freeze for up to three months. When you’re ready to enjoy, thaw overnight in the fridge, then let sit at room temperature for 20 minutes. The cake’s texture remains buttery, and the glaze revives beautifully.
Best Reheating Method
Preheat your oven to 300°F (150°C). Place a slice on a baking sheet and cover loosely with foil. Heat for 8‑10 minutes, or until the interior is warmed through. Add a tiny splash of water (about a teaspoon) to the foil before sealing; the steam will revive the crumb and keep the glaze from cracking.