I was in the middle of a rainy Saturday night, the kind where the thunder drummed against the windows and my cravings for something sweet turned into an all‑out obsession. I opened the pantry, stared at a sad tub of store‑bought dairy ice cream, and thought, “Nope, not today.” I wanted something that felt indulgent, but also aligned with my vegan lifestyle, and I didn’t have an ice‑cream maker in sight. That’s when I dared myself to whip up a pistachio masterpiece using only a saucepan, a blender, and a freezer. The result? A velvety, nutty delight that made my kitchen smell like a Mediterranean spring garden, and it was so good I almost ate the entire batch before anyone else could get a spoon.
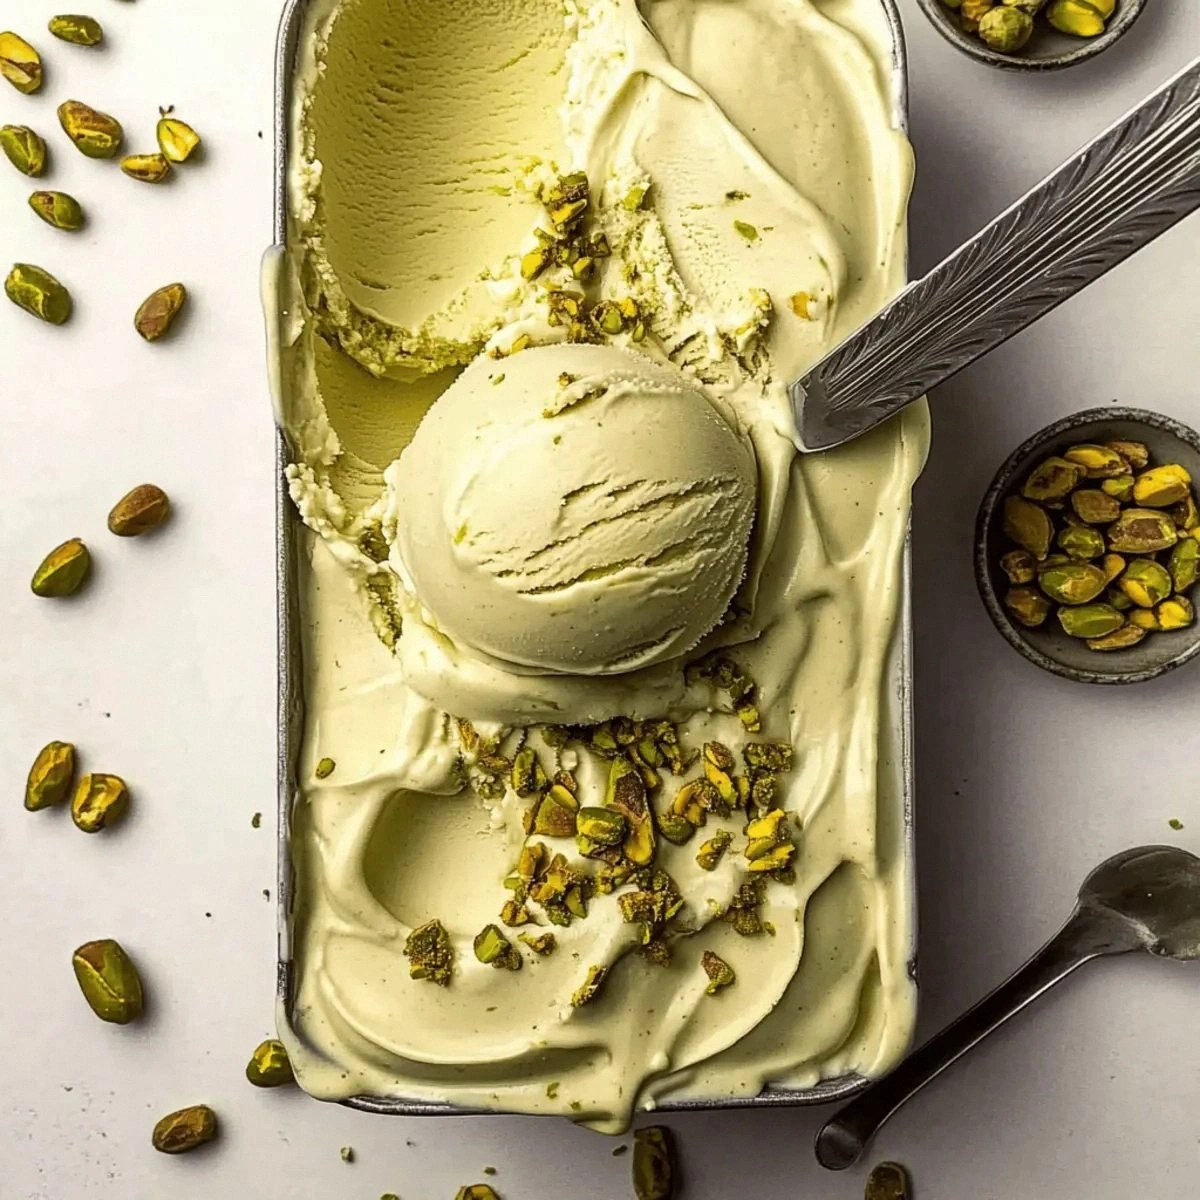
Picture the scene: the pistachios crackling as they toast, the sweetened condensed milk bubbling gently, the aroma of vanilla drifting like a soft breeze. The texture of the mixture as it thickens is like watching clouds condense into cream—smooth, dense, and impossibly rich. When you finally scoop it, the ice cream glides across the spoon like satin, with specks of pistachio that add a satisfying crunch. The taste is a perfect balance of buttery nuts, subtle sweetness, and that whisper of salt that makes every bite sing. I’m not exaggerating when I say this is hands down the best version you’ll ever make at home.
What makes this recipe truly stand out is a secret technique: I blend a portion of the pistachios into a paste before folding them into the custard. This not only intensifies the flavor but also creates a natural stabilizer, giving the ice cream that luxurious, melt‑in‑your‑mouth feel without any churn. Most recipes either skip the paste or rely on heavy stabilizers that mask the pistachio’s natural taste. Here, the pistachio is the star, and every other ingredient simply plays supporting roles. I’ll be honest — I ate half the batch before anyone else got to try it, and I have no regrets.
If you’ve ever struggled with icy, grainy vegan ice cream, you’re not alone — and I’ve got the fix. The method I’m about to share is a game‑changer, a no‑machine delight that takes the guesswork out of the process. I dare you to taste this and not go back for seconds. Ready for the game‑changer? Let me walk you through every single step — by the end, you’ll wonder how you ever made it any other way.
What Makes This Version Stand Out
- Flavor Explosion: The pistachio paste concentrates the nutty essence, delivering a punch that ordinary recipes simply can’t match.
- Silky Texture: The combination of dairy‑free whipping cream and sweetened condensed milk creates a custard that freezes into a buttery‑smooth scoop.
- Simplicity: No ice‑cream maker, no fancy equipment—just a saucepan, a blender, and a freezer.
- Ingredient Integrity: Using raw pistachios and a vegan condensed milk keeps the dish clean, wholesome, and free from hidden animal products.
- Crowd‑Pleaser: Even the most skeptical non‑vegans ask for seconds, proving that good flavor transcends dietary labels.
- Make‑Ahead Magic: The mixture can be prepared ahead of time, letting the flavors meld while you get ready for the party.
- Season‑Proof: Pistachios are available year‑round, making this a reliable go‑to dessert for any occasion.
- Eco‑Friendly: Fewer appliances mean less energy consumption, and the recipe uses mostly pantry staples.
Inside the Ingredient List
The Flavor Base
Raw pistachios are the heart of this dessert. Their natural oils provide a buttery richness that dairy‑free milks can’t replicate. If you skip them, you’ll end up with a bland, watery scoop that lacks the signature green hue. For the best results, choose unsalted, raw pistachios and give them a quick toast to enhance their aroma. You can also substitute almonds for a different nutty profile, but you’ll lose that unmistakable pistachio punch.
The Texture Crew
The dairy‑free sweetened condensed milk acts as the sweet, thick backbone, while the dairy‑free whipping cream adds airy lightness. Together they form a custard that freezes into a luxurious mouthfeel. If you’re looking to cut calories, replace half the whipping cream with coconut milk, but expect a slight coconut aftertaste. Skipping the condensed milk will result in a thin, icy texture that’s far from the dreamy consistency we’re after.
The Unexpected Star
A splash of vanilla extract and a pinch of salt might seem trivial, yet they are the secret conductors of flavor harmony. The vanilla adds a sweet floral note that lifts the pistachio, while the salt amplifies the nutty depth. If you’re feeling adventurous, a drop of almond extract can add an extra layer of complexity, but be careful not to overpower the pistachio’s natural taste.
The Final Flourish
The reserved pistachio mixture—essentially the leftover ground pistachios—adds texture and a burst of nutty crunch in every bite. It’s the difference between a smooth ice cream and one that feels like it’s missing that satisfying snap. If you can’t find raw pistachios, you can use high‑quality pistachio butter, but the texture will be slightly creamier and less crunchy.
Everything's prepped? Good. Let's get into the real action…
The Method — Step by Step
Gather all your ingredients and set out a large saucepan, a high‑speed blender, a whisk, and a shallow freezer‑safe container. I like to line the container with parchment paper; it makes scooping later a breeze. This is the moment of truth—make sure everything is within arm’s reach, because once the mixture starts to thicken, you’ll want to move fast.
Toast the raw pistachios over medium heat for 3‑4 minutes, stirring constantly. You’ll hear a gentle crackle, and the scent will turn fragrant, like a nutty perfume. Once they’re lightly golden, transfer them to a plate to cool—this prevents over‑cooking.
While the pistachios cool, pour the dairy‑free sweetened condensed milk into the saucepan. Warm it over low heat, stirring occasionally, until it just begins to steam. You’ll notice tiny bubbles forming at the edges; that’s your cue that the milk is ready for the next step.
Add the dairy‑free whipping cream to the warmed condensed milk, whisking continuously. The mixture should become glossy and start to thicken slightly. Keep the heat low—if it boils, you’ll risk a grainy texture later.
Now, the magic: transfer half of the toasted pistachios (about 1 cup) into your blender, add the vanilla extract and the pinch of salt, then blend until you achieve a smooth, emerald‑green paste. This is pure pistachio gold; the blender will turn the nuts into a silky slurry that will coat the ice cream like velvet.
Stir the pistachio paste into the warm milk‑cream mixture, ensuring it’s fully incorporated. The color should shift to a deep, inviting green, and the aroma will become intoxicatingly nutty. Let the combined mixture continue to warm for another 2‑3 minutes, just until it reaches a gentle simmer—watch out for the edges pulling away from the pan.
Remove the saucepan from heat and let the custard cool to room temperature. To speed up cooling, place the pan in an ice bath, stirring occasionally. This step is crucial—if the mixture is too warm when it hits the freezer, you’ll end up with large ice crystals.
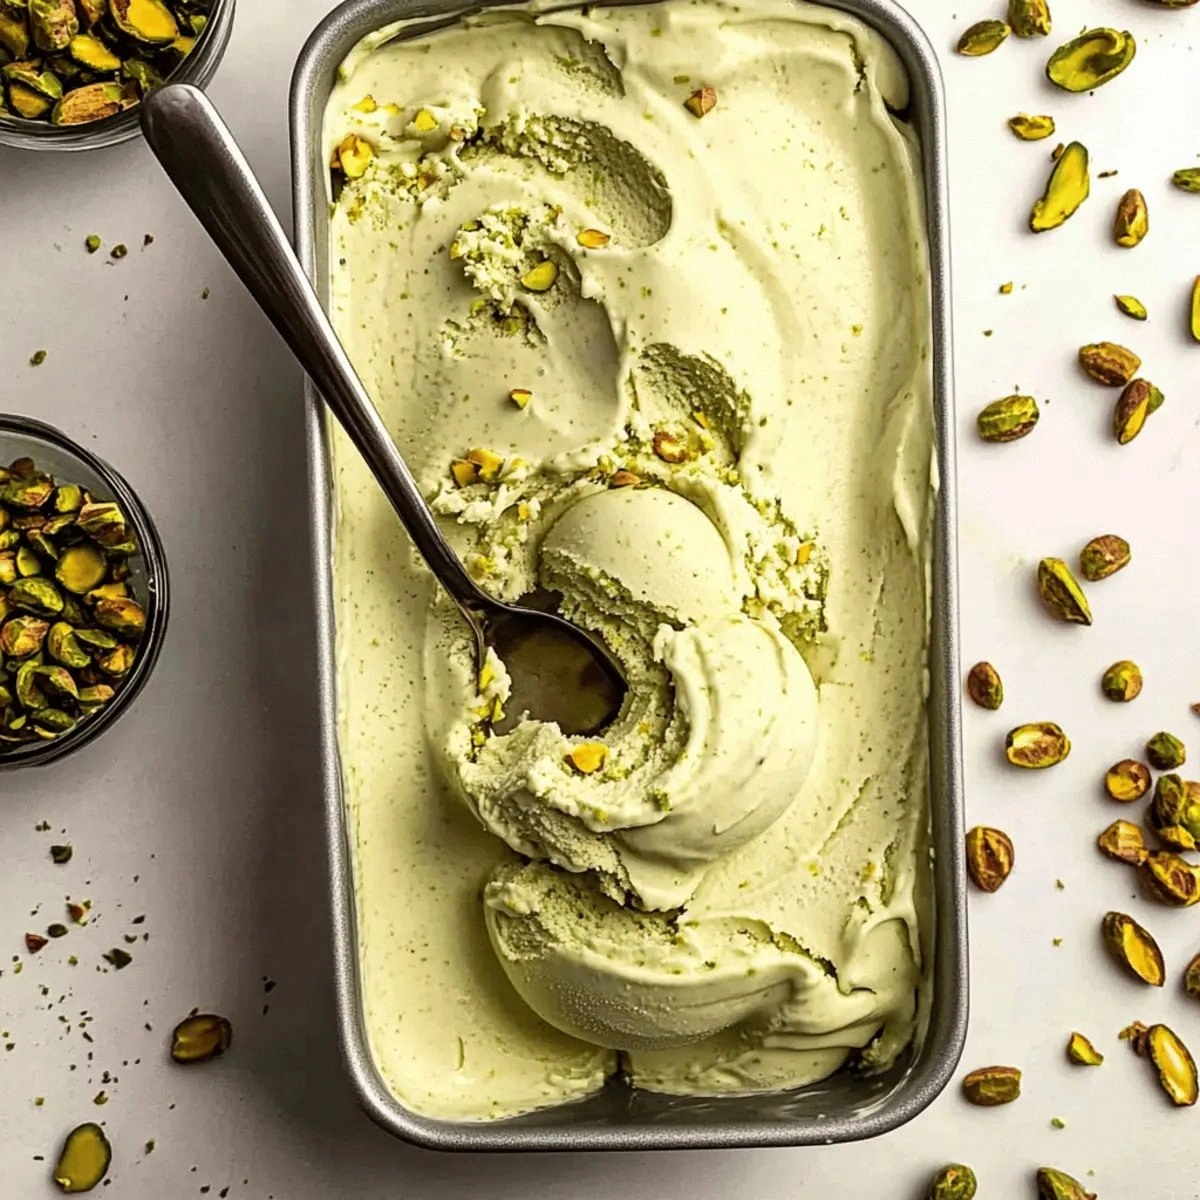
Once cooled, pour the custard into the shallow freezer‑safe container. Sprinkle the reserved pistachio mixture (the remaining 1 cup of toasted nuts) evenly over the top. This creates a delightful crunchy layer that will stay intact as the ice cream freezes.
Place the container in the freezer. After 30 minutes, pull it out and give it a vigorous stir with a spatula, breaking up any forming ice crystals. Return to the freezer and repeat this stirring process every 30 minutes for the next 2‑3 hours. This manual “churning” mimics the action of an ice‑cream machine and guarantees a smooth texture.
When the ice cream has reached a firm, scoopable consistency—usually after about 4‑5 hours total—you’re ready to serve. For an extra touch, garnish with a drizzle of pistachio‑infused olive oil or a few whole pistachios for visual flair. Picture yourself pulling this out of the freezer, the whole kitchen smelling incredible, and the first spoonful melting on your tongue like a dream.
That's it — you did it. But hold on, I've got a few more tricks that'll take this to another level…
Insider Tricks for Flawless Results
The Temperature Rule Nobody Follows
Never pour a hot mixture directly into a cold container; the shock creates ice crystals that ruin the texture. Instead, let the custard sit at room temperature, then chill it in an ice bath. I once tried to skip this step, and the result was a gritty, snow‑like ice cream that no one wanted to eat. The gradual cooling allows the fats to align perfectly, giving you that buttery mouthfeel.
Why Your Nose Knows Best
When the mixture is simmering, trust your nose more than a thermometer. You’ll detect a faint toasted pistachio aroma that signals the perfect flavor development. If the scent is weak, let it simmer a minute longer; if it becomes overly buttery, you’ve overcooked. This sensory checkpoint is a game‑changer for achieving depth without over‑processing.
The 5‑Minute Rest That Changes Everything
After the final stir before the first freeze, let the mixture rest uncovered for five minutes. This brief pause allows air bubbles to escape, resulting in a denser, smoother scoop. A friend tried to skip this rest once—let's just say the ice cream turned out overly airy and lost that luxurious heft.
Freeze‑First, Stir‑Later
Some people swear by stirring first then freezing, but I’ve found that a quick initial freeze (about 20 minutes) creates a thin crust that makes later stirring easier. The crust acts like a protective barrier, preventing the mixture from separating during the subsequent churn cycles.
The Secret Salt Ratio
A pinch of salt can make or break the flavor. I use exactly ⅛ teaspoon for a batch of four servings; any more and the pistachio’s natural sweetness gets muted. If you’re using salted pistachios, reduce the added salt by half to keep the balance perfect.
Serving Temperature Trick
Serve the ice cream at about 5‑10 minutes out of the freezer. This short melt allows the flavors to open up fully, delivering that melt‑in‑your‑mouth sensation. If you serve it too cold, the texture feels like a block of ice; too warm and it loses its structure. Timing is everything.
Creative Twists and Variations
This recipe is a playground. Here are some of my favorite ways to switch things up:
Rose‑Petal Pistachio
Add a teaspoon of rose water to the custard before freezing. The floral notes complement the pistachio’s earthiness, creating a Middle‑Eastern inspired treat that’s perfect for a summer soirée.
Chocolate Swirl
Melt dark chocolate (vegan) and swirl it through the semi‑frozen ice cream in a gentle figure‑eight motion. The bitter chocolate pairs beautifully with the nutty base, giving you a decadent ripple effect.
Citrus Zest Burst
Stir in one tablespoon of finely grated lemon or orange zest during the final stir. The citrus brightens the flavor, adding a refreshing pop that cuts through the richness.
Spiced Cardamom
Add a pinch of ground cardamom to the pistachio paste before blending. This warm spice adds depth and a subtle exotic aroma, perfect for holiday gatherings.
Berry Compote Topping
Serve a dollop of raspberry or strawberry compote on top of each scoop. The tartness of the berries balances the sweet, creamy pistachio, making each bite a harmonious contrast.
Storing and Bringing It Back to Life
Fridge Storage
If you plan to enjoy the ice cream within 24 hours, keep it in an airtight container in the freezer, not the fridge. For short‑term storage (up to 48 hours), a freezer‑safe jar with a tight lid works best. Avoid frequent temperature fluctuations; they create ice crystals.
Freezer Friendly
For longer storage (up to 2 weeks), press a sheet of parchment paper directly onto the surface of the ice cream before sealing the lid. This prevents freezer burn and preserves the pistachio’s vibrant color. When you’re ready to serve, let it sit at room temperature for 5‑10 minutes to soften.
Best Reheating Method
If the ice cream becomes too hard, place the container in a bowl of warm water for 30 seconds, then stir gently. Adding a tiny splash of water (about a teaspoon) before stirring helps re‑emulsify the fats, bringing the texture back to its original silkiness.