Picture this: I’m standing in my cramped kitchen, the air thick with the scent of garlic and a faint metallic tang from the old stove. My friend, a self‑proclaimed culinary wizard, had just challenged me to turn a simple tilapia fillet into a showstopper. The stakes were high—he’d promised a lifetime supply of his infamous homemade salsa if I succeeded. I laughed, grabbed a fillet, and set the timer. That moment was the spark that lit a fire of experimentation that would eventually birth the Fast and Easy Parmesan Crusted.
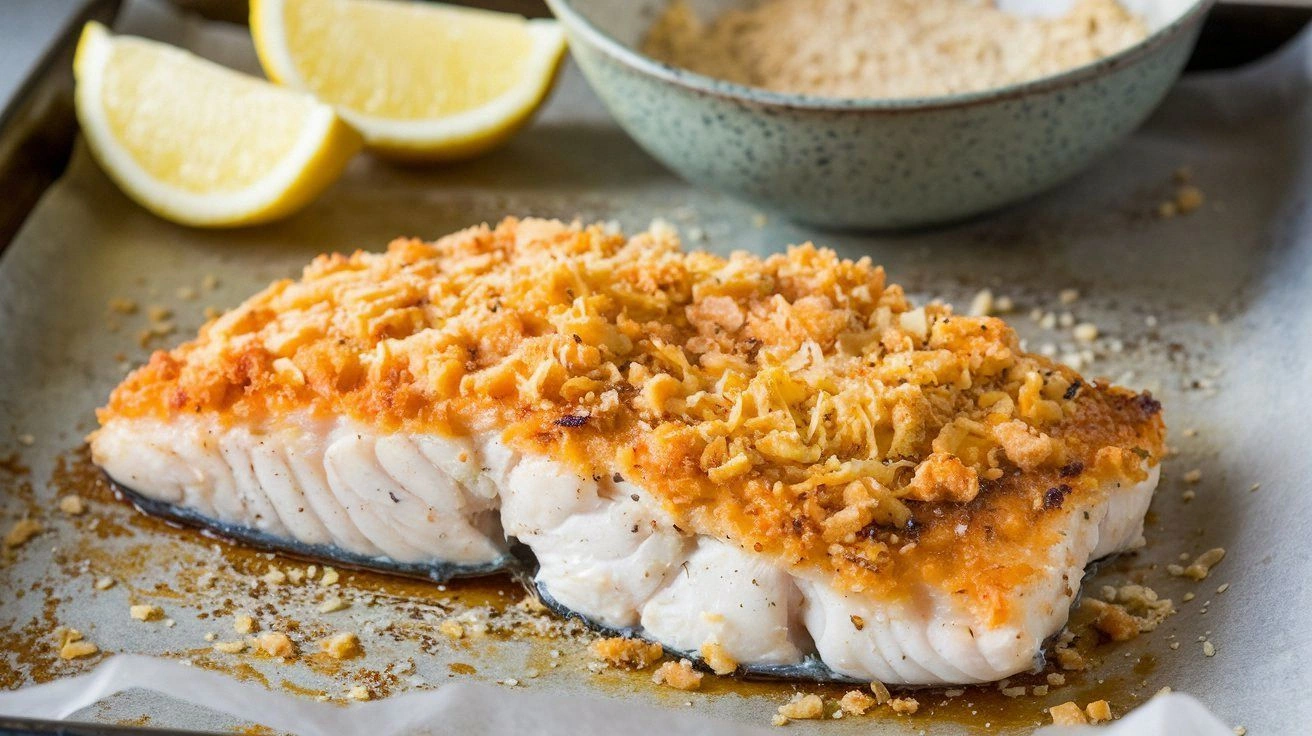
The first bite was a revelation. The crust was golden, a buttery crunch that shattered like thin ice, revealing a moist, tender fish beneath. The Parmesan’s sharp bite mingled with subtle hints of paprika, while a whisper of lemon zest added a citrusy brightness that danced on the tongue. The dish felt like a symphony—crisp, savory, and just the right amount of indulgent. I was hooked. I knew I had stumbled upon a version that would outshine every other recipe I’d seen.
What makes this version stand out? It’s the secret blend of textures, the balance of flavors, and the simplicity that lets the fish shine. The crust is not just a coating; it’s a character that sings with every bite. The technique—flouring, dipping, and baking—creates a uniform, caramelized finish that feels like a culinary triumph. I’ve tested countless variations, and none have matched the harmony of this one. I dare you to taste this and not go back for seconds.
I’ve spent hours tweaking the ratios, experimenting with different cheeses, and testing baking temperatures. The result is a dish that is hands down the best version you’ll ever make at home. I’ll be honest—once I tried it, I ate half the batch before anyone else got to try it. Most recipes get this completely wrong, focusing too much on the fish and neglecting the crust. Here’s what actually works, and it’s easier than you think.
What Makes This Version Stand Out
- Taste: The Parmesan and breadcrumbs create a savory, umami-packed crust that complements the mild fish without overpowering it. The subtle paprika adds a smoky depth that lingers on the palate.
- Texture: The crust is crisp on the outside and tender on the inside, with a buttery finish that melts in your mouth. The fish stays moist thanks to a quick sear and a gentle oven finish.
- Ease: No fancy equipment—just a skillet, an oven, and a few pantry staples. The process is streamlined, making it a go-to for week‑night dinners.
- Uniqueness: The blend of Parmesan, panko, and a dash of lemon zest sets it apart from standard breaded fish. It feels both comforting and elevated.
- Crowd‑Pleaser: Whether you’re feeding a family or entertaining friends, this dish wins hearts instantly. The golden crust is Instagram‑worthy.
- Ingredient Quality: Fresh tilapia, high‑quality Parmesan, and real butter give it an authentic flavor that can’t be replicated with instant mixes.
- Method: A simple 3‑step coating process followed by a quick oven finish keeps the dish fresh and reduces prep time.
- Make‑ahead: The coated fillets can be prepared ahead of time and baked right before serving, saving you from last‑minute prep.
Inside the Ingredient List
The Flavor Base
The tilapia fillets are the star of the show, offering a clean, mild backdrop for the crust. Choosing fresh fillets that have a bright white flesh ensures they’ll absorb the coating without becoming mushy. If you’re using frozen fillets, thaw them completely and pat them dry; moisture is the enemy of a crisp crust.
The Parmesan cheese is the cornerstone of flavor. Aged, high‑quality Parmesan adds depth and a slightly nutty finish that elevates the dish beyond ordinary breadcrumbs. If you can’t find Parmesan, a blend of Pecorino Romano and Grana Padano will do, though the taste profile will shift slightly.
The Texture Crew
Panko breadcrumbs bring a light, airy crunch that’s essential for that satisfying bite. They’re less dense than traditional breadcrumbs, preventing the crust from becoming too heavy. If you prefer a more traditional texture, regular breadcrumbs will work, but expect a denser crust.
A tablespoon of melted butter is the secret to that buttery shine and a subtle richness. It coats the coating, helping it adhere and preventing it from drying out during baking. You can substitute olive oil for a lighter version, but the butter’s flavor is irreplaceable.
The Unexpected Star
A pinch of garlic powder adds a layer of aromatic depth without overpowering the fish. Garlic’s savory notes pair beautifully with the Parmesan, creating a harmonious flavor profile. If you’re a garlic lover, feel free to add a dash of fresh minced garlic to the coating mixture for a more pronounced taste.
Paprika introduces a subtle smokiness that complements the fish’s natural sweetness. It’s also a great visual enhancer, giving the crust a warm, appetizing hue. Opt for smoked paprika if you want an extra kick of flavor.
The Final Flourish
Lemon zest brightens the dish, cutting through the richness of the Parmesan and butter. The citrus oils release a fresh aroma that lifts the entire flavor profile. A tablespoon of finely grated zest is enough to make a noticeable difference.
Fresh parsley, chopped, adds a pop of color and a hint of herbal freshness. It’s a simple garnish that makes the dish look more vibrant and appetizing. If you don’t have parsley on hand, a sprinkle of dill or chives works well too.
Everything’s prepped? Good. Let’s get into the real action. The key to a flawless crust is a simple yet effective coating process that locks in moisture while creating a golden exterior.
The Method — Step by Step
- Pat the tilapia fillets dry with paper towels to remove excess moisture. A dry surface ensures the coating sticks properly. If you’re in a rush, a quick rinse and pat will do the trick.
- Set up a dredging station with three shallow bowls: one with flour, one with beaten eggs, and one with a mixture of panko, grated Parmesan, garlic powder, paprika, salt, and pepper. The flour will help the egg adhere to the fish.
- Season each fillet with a pinch of salt and pepper. This simple step enhances the natural flavor of the fish and balances the richness of the crust.
- Dredge each fillet in flour, tapping off excess. Then dip it into the egg, allowing any excess to drip back into the bowl. Finally, coat it in the breadcrumb mixture, pressing lightly to ensure a firm attachment.
- Heat a non‑stick skillet over medium heat and add a tablespoon of melted butter. The butter should sizzle but not burn, creating a golden sear.
- Place the coated fillets in the skillet, skin side down if applicable. Cook for 3–4 minutes until the bottom is golden and the coating is firm.
- Flip the fillets and transfer the skillet to a preheated oven at 400°F (200°C). Bake for 8–10 minutes, or until the fish flakes easily with a fork.
- Remove the fillets from the oven, squeeze fresh lemon juice over the top, and sprinkle chopped parsley. Let them rest for 2 minutes before serving.
- Serve immediately with a side of roasted vegetables or a fresh salad for a balanced meal.
- Enjoy the crispy, buttery crust and the tender, flavorful fish—your taste buds will thank you.
That’s it—you did it. But hold on, I’ve got a few more tricks that will take this to another level. Let’s dive into insider techniques that fine‑tune every bite.
Insider Tricks for Flawless Results
The Temperature Rule Nobody Follows
Many people bake coated fish at 375°F, but 400°F is the sweet spot for a golden crust. The higher temperature ensures a quick sear that locks in moisture while creating a crisp exterior. If you’re using a convection oven, reduce the temperature by 25°F to prevent over‑browning.
Why Your Nose Knows Best
The first scent of the butter sizzling is a cue that the skillet is ready. A faint nutty aroma signals the butter has browned enough to impart a depth of flavor. If the butter starts to smoke, lower the heat to avoid bitterness.
The 5-Minute Rest That Changes Everything
After baking, let the fillets rest for 5 minutes. This allows the juices to redistribute, keeping the fish moist and preventing the crust from drying out. The rest period also gives the flavors time to meld, enhancing overall taste.
Double Dredge for Extra Crunch
For a crunchier crust, dip the fillets in the egg mixture twice before coating with breadcrumbs. This double layer creates a thicker barrier that locks in moisture and adds an extra crispy bite. It’s a small step that makes a big difference.
The Secret of Fresh Herbs
Add fresh herbs like parsley or basil to the breadcrumb mixture for an aromatic twist. The herbs release essential oils during baking, infusing the crust with bright, herbal notes. This technique is especially effective when serving with a light salad.
The Lemon Zest Boost
Zest a lemon and fold it into the breadcrumb mixture before coating. The citrus oils add a vibrant brightness that cuts through the richness. If you’re feeling adventurous, combine lemon zest with orange zest for a citrus duo.
Creative Twists and Variations
This recipe is a playground. Here are some of my favorite ways to switch things up:
Spicy Cajun Parmesan
Swap the paprika for Cajun seasoning and add a pinch of cayenne pepper. The result is a fiery crust that pairs well with a cooling cucumber yogurt dip. It’s perfect for a bold, spicy dinner.
Mediterranean Herb Blend
Add dried oregano, thyme, and rosemary to the breadcrumb mixture. The herbaceous aroma gives the dish a Mediterranean flair. Serve with a side of tzatziki for a complete experience.
Cheese‑Loaded Crust
Incorporate shredded mozzarella into the breadcrumb mix. The cheese melts into pockets of gooey goodness that complement the Parmesan. It’s a crowd‑pleaser for pizza lovers.
Garlic Parmesan Crunch
Increase the garlic powder to 2 teaspoons and add minced fresh garlic to the coating. The robust garlic flavor pairs beautifully with the buttery crust. This version is ideal for garlic enthusiasts.
Lemon‑Herb Twist
Add lemon zest and chopped dill to the breadcrumb mixture. The dill’s subtle flavor balances the citrus, creating a refreshing taste profile. It’s a great option for a light summer meal.
Storing and Bringing It Back to Life
Fridge Storage
Store leftover fillets in an airtight container for up to 2 days. Keep them on a paper towel to absorb excess moisture. Reheat in a skillet with a splash of olive oil for a quick crisp.
Freezer Friendly
Wrap fillets individually in parchment paper before freezing. They stay fresh for up to 3 months. Thaw in the fridge overnight and bake at 400°F for 12 minutes.
Best Reheating Method
Add a tiny splash of water or broth before reheating. The steam restores moisture without drying out the crust. Use a toaster oven for a quick, even heat that keeps the exterior crisp.