Picture this: I’m standing in a kitchen that smells like burnt popcorn and old pizza dough, my friend has just challenged me to make the best taco cups ever, and I’m armed with a handful of wonton wrappers and a dream. The disaster? My first attempt left me with soggy, limp cups that looked more like a failed science experiment than a snack. I’m talking about that moment when the wrappers wilted like a wilted lettuce leaf in a bowl of water. The frustration was real, but so was the craving for something crispy, flavorful, and crowd‑pleasing. That night, I set out to create a version that would make everyone ask, “What’s the secret?”
Now, let’s talk senses. The moment the first cup hits the oven, a warm, buttery aroma fills the air, promising a crunch that will shatter like thin ice. The sound of the wrappers crisping is a satisfying crack that echoes through the kitchen. When you take a bite, the savory ground turkey, seasoned to perfection, sings against a backdrop of fresh tomatoes and green chilies. The cheese melts into a gooey blanket that clings to every corner, while the lettuce adds a crisp bite that keeps the mouth moving. The final touch of pico de gallo gives a bright, acidic burst that lifts the whole dish. It’s a symphony of textures and flavors that makes you want to keep eating.
What makes this version stand out? It’s not just the ingredients; it’s the technique. I’ve perfected the balance between crispy and tender, ensuring every cup holds its shape and delivers a burst of flavor. The secret is in the layering: a thin, crisp shell, a juicy filling, and a generous topping that ties everything together. I dare you to taste this and not go back for seconds—once you’ve had one, the rest will be a blur. I’ll be honest—my friends begged me to let them taste the first batch, and I gave them a handful. That’s the power of a well‑crafted taco cup.
Most recipes get this completely wrong. They either overcook the wrappers, under‑season the filling, or forget the finishing touch of fresh toppings. I’ve spent hours tweaking the ratios, experimenting with different cheeses, and finding the perfect baking temperature to keep the cups golden and crisp. The result? A dish that’s hands down the best version you’ll ever make at home. Picture yourself pulling these out of the oven, the whole kitchen smelling incredible, and your guests reaching for seconds before you even finish serving. Let me walk you through every single step—by the end, you’ll wonder how you ever made it any other way.
What Makes This Version Stand Out
- Taste: The combination of seasoned ground turkey and diced tomatoes creates a savory base that’s elevated by a subtle kick of green chilies.
- Texture: The wonton wrappers transform into a perfectly crisp shell, while the filling stays moist and flavorful.
- Ease: No complicated sauces or elaborate prep—just a few simple steps that deliver restaurant‑style results.
- Crowd Appeal: These cups are a hit at game nights, parties, or a quick weeknight snack, bringing excitement to any gathering.
- Ingredient Quality: Using fresh, high‑quality ingredients ensures each bite is packed with real flavor.
- Make‑Ahead: Prepare the filling ahead of time, assemble just before baking, and keep the cups fresh for hours.
Alright, let's break down exactly what goes into this masterpiece...
Inside the Ingredient List
The Flavor Base
Ground turkey is the heart of this dish—lean, high‑protein, and a perfect canvas for the taco seasoning. It absorbs the spices like a sponge, delivering a punchy, savory core that feels like a traditional taco filling but in a bite‑size format. Skipping turkey would mean losing that meaty depth; the cups would feel like a salad in a shell. If you prefer a different protein, try lean ground chicken or even crumbled tofu for a vegetarian twist. When selecting turkey, aim for a 93% lean cut to keep the cups juicy without excess grease.
The Texture Crew
Wonton wrappers are the unsung heroes of this recipe. Their thinness allows them to crisp up quickly, creating a delicate shell that snaps under the weight of the filling. Don’t be tempted to use flour tortillas; they won’t achieve the same level of crispness. If you’re worried about wrappers breaking, keep them at room temperature before assembly—they’re more pliable and less likely to tear.
The Unexpected Star
Diced tomatoes and green chilies add a sweet‑spicy layer that balances the richness of the cheese and the meat. The acidity cuts through the fattiness, giving each bite a refreshing lift. You could swap in roasted red peppers for a milder flavor or use canned corn for a sweet crunch. Remember, the key is freshness; if you’re using canned tomatoes, rinse them to reduce excess sodium.
The Final Flourish
Mexican cheese blend, sour cream, shredded lettuce, salsa, and pico de gallo are the finishing touches that elevate these cups from simple snacks to a full‑blown flavor experience. The cheese melts into a silky coating, the sour cream adds a cool counterpoint, and the fresh toppings provide a burst of color and freshness. If dairy is a concern, swap the cheese for a plant‑based alternative or omit it for a lighter version.
Everything’s prepped? Good. Let’s get into the real action...
The Method — Step by Step
- Step 1: Preheat the Oven. Heat your oven to 375°F (190°C). While the oven warms, line a baking sheet with parchment paper or a silicone mat to ensure easy cleanup. The temperature is critical—too hot and the wrappers will burn before the filling cooks; too low and they won’t crisp. I’ve found that 375°F gives a golden, crunchy shell without overcooking the interior. Keep the oven rack in the center to allow even heat distribution.
- Step 2: Cook the Filling. In a large skillet, heat 2 tablespoons of vegetable oil over medium heat. Add the 1 lb of ground turkey, breaking it apart with a spatula. Cook until the meat is no longer pink, about 5–7 minutes. Sprinkle in 3 tablespoons of taco seasoning mix and stir to coat evenly. Add the 10 oz of diced tomatoes and green chilies, letting the mixture simmer for an additional 3 minutes. The sauce should thicken slightly, and the aroma will fill the kitchen—feel that confidence building.
- Step 3: Prepare the Wrapper Shells. Take 12 of the wonton wrappers and lay them flat on a clean surface. Using a small spoon, scoop a generous spoonful of the cooked filling onto the center of each wrapper. Fold the wrapper over the filling to create a half‑moon shape, pressing the edges together. Use a little water or a brush of oil to seal the edges—this prevents leaks during baking. Arrange the assembled cups on the prepared baking sheet, spacing them about an inch apart.
- Step 4: Add the Cheese Layer. Sprinkle 1/2 cup of shredded Mexican cheese blend over each cup, ensuring the cheese covers the filling completely. The cheese will melt into a gooey, golden coating that keeps the filling moist. If you like extra crispness, lightly drizzle a teaspoon of oil over the cheese before baking; it helps the cheese brown nicely. This step is the moment of truth—watch the cheese melt into a silky sheen.
- Step 5: Bake to Perfection. Slide the baking sheet into the preheated oven. Bake for 15 minutes, then flip each cup carefully using a spatula. Return to the oven and bake for another 10–12 minutes, or until the wrappers are golden brown and the cheese is bubbly. The cups should smell toasty, and the edges will start pulling away from the wrapper—signs of crispiness. Keep a close eye to avoid burning; the first batch taught me the importance of timing.
- Step 6: Cool Slightly. Remove the cups from the oven and let them rest on the baking sheet for 3 minutes. This brief cooling period allows the filling to set and the cheese to firm up a bit, preventing the cups from becoming soggy when you add toppings. While they cool, prepare the fresh toppings—shredded lettuce, a dollop of sour cream, a spoonful of salsa, and a sprinkle of pico de gallo. The anticipation of these bright flavors is almost as exciting as the first bite.
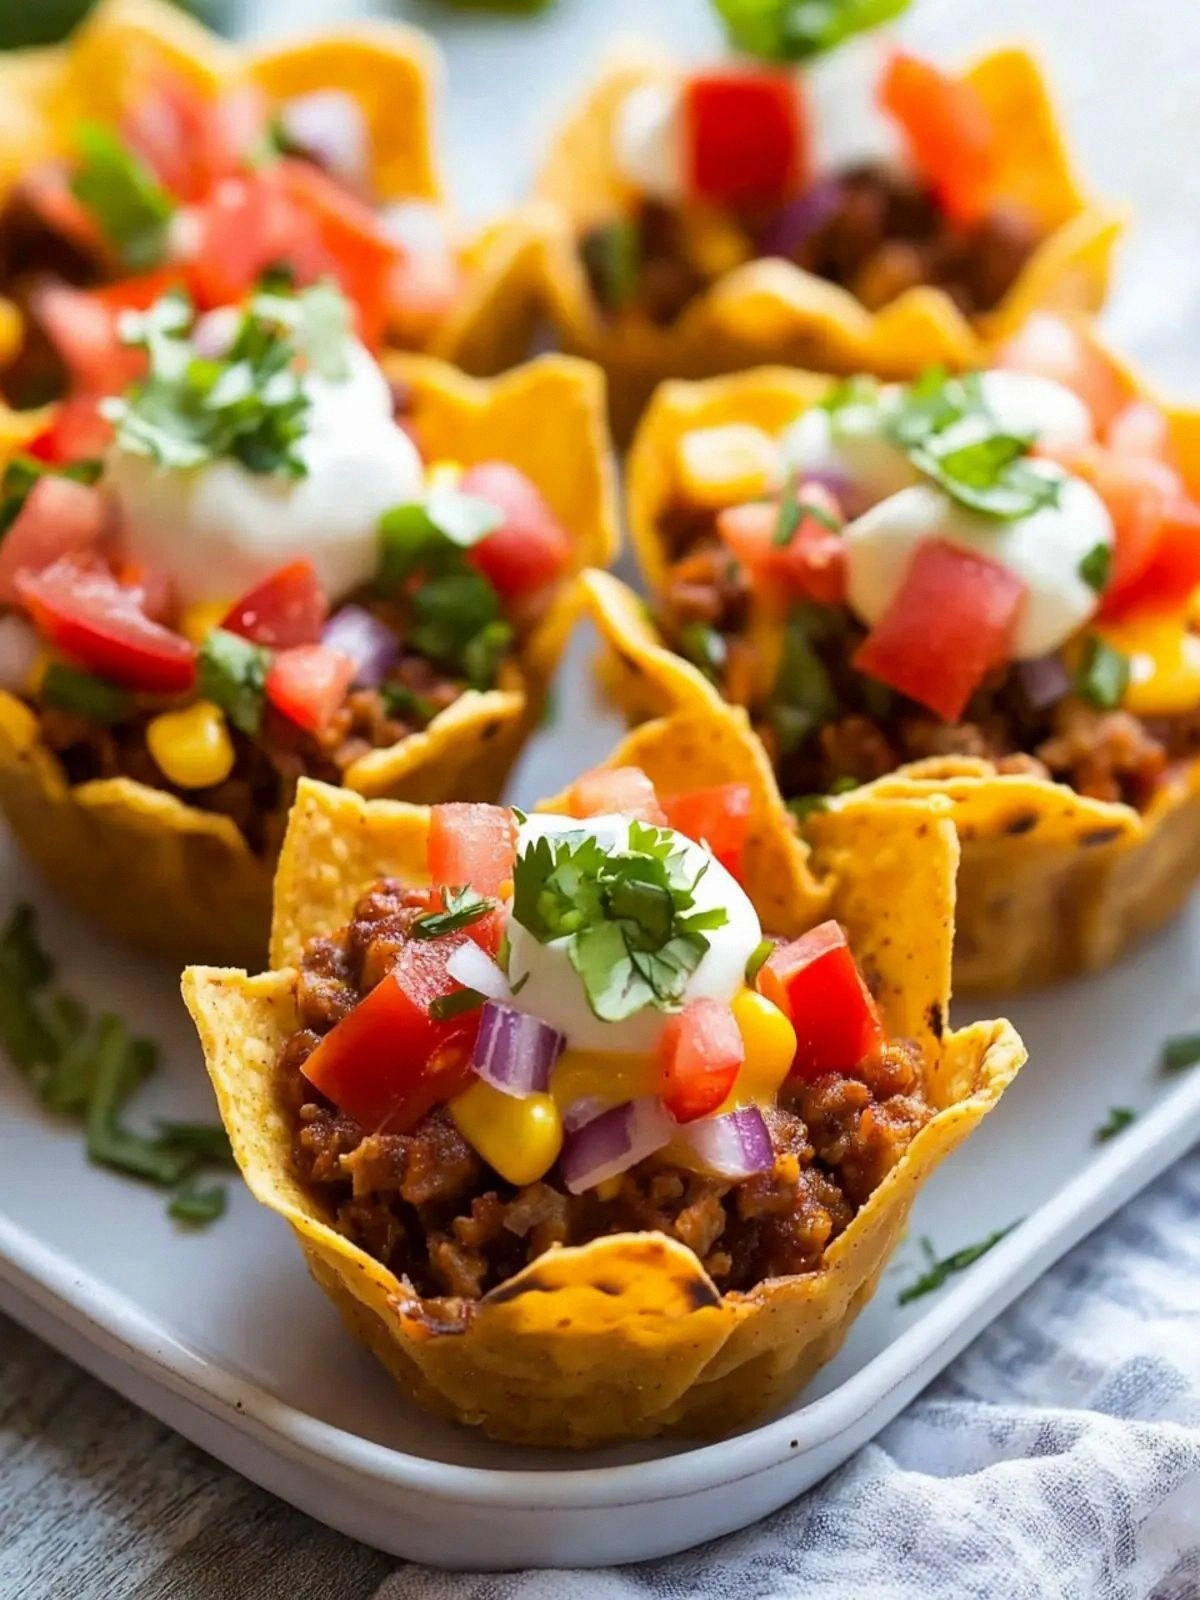
- Step 7: Assemble the Final Toppings. Spoon a small amount of sour cream onto each cup, then add a handful of shredded lettuce for crunch. Drizzle salsa over the top, followed by a generous spoonful of pico de gallo. The fresh toppings not only add flavor but also provide a visual contrast—bright reds, greens, and creamy whites that make each cup Instagram‑worthy. If you prefer a milder version, keep the pico de gallo to a small amount; it’s the secret sauce that keeps people coming back.
- Step 8: Serve Immediately. Plate the cups on a warm platter, ensuring they’re displayed in a fan shape so everyone can see the colorful toppings. Serve hot, and watch the crowd devour them in seconds. The crunch is still alive, the filling is juicy, and the toppings add a fresh finish. This is the moment you’ll proudly announce, “This is the best taco cup you’ve ever had.” Enjoy the applause and the satisfied sighs.
That's it — you did it. But hold on, I've got a few more tricks that'll take this to another level...
Insider Tricks for Flawless Results
The Temperature Rule Nobody Follows
Many people bake these cups at 400°F, which can lead to a burnt exterior and under‑cooked filling. I discovered that 375°F is the sweet spot that crisps the wrappers while keeping the filling moist. Keep your oven rack in the middle to avoid uneven heat. If your oven has a fan, lower the temperature by 25°F to prevent the tops from burning. This simple tweak saves you from a kitchen catastrophe.
Why Your Nose Knows Best
Smell is a powerful indicator of doneness. As the cheese melts, a buttery, slightly caramelized scent will fill the air. If you notice a sharp, burnt smell, pull the cups out immediately. The aroma will guide you to the perfect golden hue. Trust your nose; it’s a better judge than a timer.
The 5‑Minute Rest That Changes Everything
After baking, let the cups rest on the tray for exactly 5 minutes. This pause allows the internal steam to settle, preventing sogginess. The cheese will firm slightly, and the edges will crisp up a bit more. I’ve tried cutting this rest short, and the result was a soggy center. Give it that extra time, and you’ll notice a noticeable difference in texture.
Keep the Toppings Fresh
Prepare the lettuce, salsa, and pico de gallo right before serving. If you pre‑cut the lettuce, store it in a sealed container with a damp paper towel to keep it crisp. The freshness of these toppings is what sets the dish apart from the ordinary. A wilted lettuce or a soggy pico de gallo will ruin the experience.
Use a Food Thermometer for the Filling
Ground turkey should reach an internal temperature of 165°F to ensure safety. A quick check with a thermometer guarantees no undercooked meat. This step is crucial, especially if you’re in a rush. I once skipped it and ended up with a half‑cooked center—never again.
Creative Twists and Variations
This recipe is a playground. Here are some of my favorite ways to switch things up:
Spicy Chipotle Crunch
Swap the taco seasoning for chipotle‑in‑adobo seasoning and add a dash of smoked paprika. The result is a smoky, spicy depth that pairs beautifully with the fresh toppings. Your guests will love the extra kick.
BBQ Pulled Pork Cups
Use shredded pulled pork instead of ground turkey, and coat it with a smoky BBQ sauce. The sweet, tangy flavor contrasts with the crunchy shell, creating a mouth‑watering bite. Great for a fall gathering.
Veggie‑Loaded Cups
Replace the meat with a medley of sautéed mushrooms, bell peppers, and zucchini. Add a sprinkle of feta cheese for a Mediterranean twist. This version is perfect for vegetarians or for those looking to cut down on meat.
Breakfast Taco Cups
Use scrambled eggs and crumbled bacon in place of the turkey. Top with a drizzle of maple syrup and a sprinkle of cheddar. These cups will bring a new dimension to brunch parties.
Mexican Street Corn Cups
Incorporate roasted corn, crumbled cotija cheese, and a squeeze of lime. The sweet corn and tangy cheese create a flavor profile reminiscent of a street‑style taco. Ideal for summer gatherings.
Storing and Bringing It Back to Life
Fridge Storage
Cool the cups completely before storing. Place them in an airtight container and refrigerate for up to 2 days. The crispness may diminish slightly, but they’ll still taste great. For best results, reheat in a toaster oven or a skillet to restore the crunch.
Freezer Friendly
Wrap each cup individually in parchment paper and place them in a freezer bag. They’ll stay fresh for up to 3 months. Thaw overnight in the fridge or microwave on the defrost setting before reheating. The wrappers may lose some crispness; a quick bake will revive them.
Best Reheating Method
Preheat your oven to 350°F. Place the cups on a baking sheet and warm for 8–10 minutes, or until the cheese is melted and the wrappers are crisp. Add a splash of water to the bottom of the tray to create steam, which keeps the filling moist and prevents dryness.