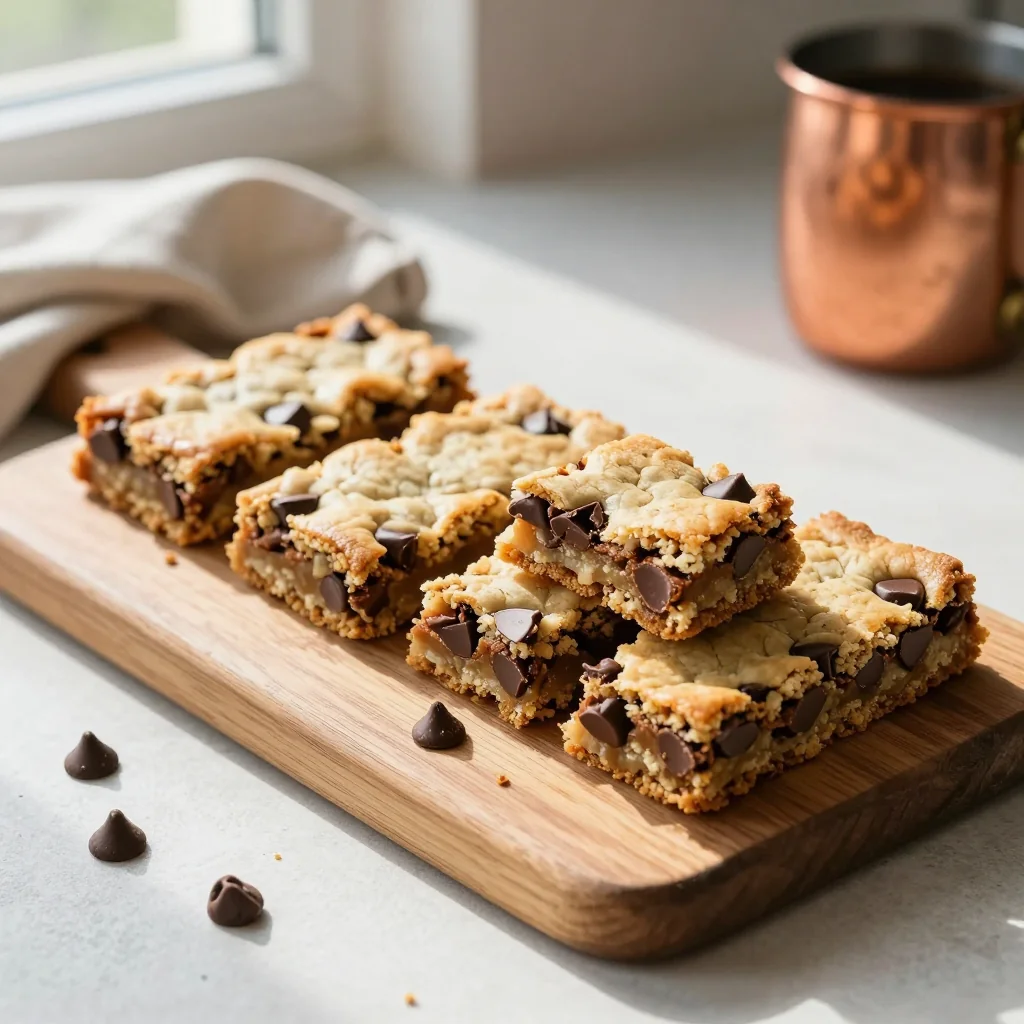
A soft‑chewy, buttery bar loaded with melty chocolate chips – perfect for sharing or savoring solo.
When I was eight, my grandmother would pull a tray of warm cookie bars from the oven, the sweet aroma wrapping around the kitchen like a cozy blanket. I still remember the way the chocolate melted into the soft crumb, creating little pockets of molten bliss that made every bite feel like a hug. Those moments sparked my lifelong love for baked treats that are simple yet unforgettable.
Chocolate chip cookie bars are a timeless classic, rooted in the American tradition of the chocolate chip cookie but transformed into a bar that’s easy to serve at parties, potlucks, or a quiet night in. Their flat, uniform shape makes them perfect for portion control while preserving that iconic chewy‑soft texture we all adore.
In this guide, I’ll walk you through every nuance—from choosing the right butter to mastering the perfect bake—so you can recreate that nostalgic flavor with confidence. You’ll learn why each ingredient matters, how to tweak the recipe for dietary needs, and the secrets to achieving that golden‑brown edge with a gooey centre.
Let’s dive in, roll up our sleeves, and turn simple pantry staples into a batch of bars that will become the star of your dessert repertoire.
🌟 Why This Recipe Will Captivate You
These bars blend the classic comfort of a chocolate chip cookie with the convenience of a slice‑and‑serve dessert.
- ✨ Foolproof Texture: The balanced ratio of butter to sugar yields a chewy interior while the edges turn delightfully crisp, satisfying both texture lovers.
- ✨ Ingredient Flexibility: You can swap in dark chocolate, white chocolate, or even chopped nuts without compromising the core flavor.
- ✨ Scalable Portions: Whether you need a single tray for a family gathering or a double batch for a party, the built‑in portion adjuster makes scaling effortless.
- ✨ Minimal Equipment: All you need is a mixing bowl, a spatula, and a standard 9×13‑inch baking pan – perfect for novice bakers.
- ✨ Shelf‑Stable Delight: Properly stored, these bars stay fresh for up to a week, making them ideal for make‑ahead desserts.
- ✨ Crowd‑Pleaser: Sweet, buttery, and chocolate‑laden, they appeal to kids and adults alike, guaranteeing a smile at any gathering.
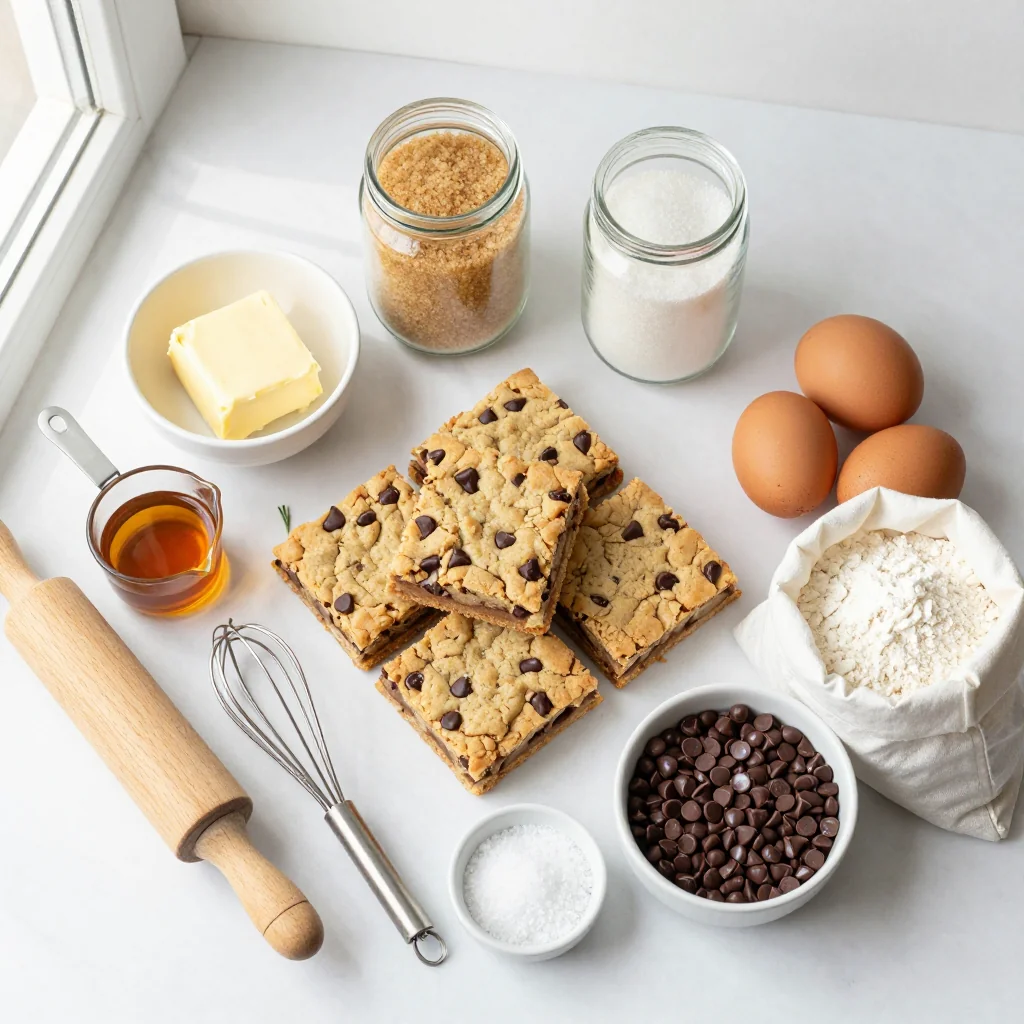
🥗 The Ingredients
📝 Complete Ingredient List
For the Cookie Base:
For the Chocolate Chips:
Optional Garnish:
🔍 Focus on Key Ingredients
Unsalted Butter
Butter is the heart of any good cookie. Using unsalted butter lets you control the salt level precisely, and melting it before mixing ensures an even distribution of fat, which creates that coveted chewy crumb. Look for butter with a butterfat content of at least 80 % for richness.
Brown Sugar
Brown sugar adds moisture and a subtle caramel flavor thanks to its molasses content. It also contributes to the chewy texture by retaining moisture during baking. For a deeper flavor, you can use dark brown sugar, but the recipe works perfectly with light brown sugar.
Semi‑Sweet Chocolate Chips
The chocolate chips provide pockets of melt‑in‑your‑mouth sweetness. Semi‑sweet strikes the perfect balance between sweet and bitter, complementing the buttery base without overwhelming it. If you prefer a richer chocolate taste, feel free to substitute with dark chocolate chips (70 % cacao).
🔄 Quick Substitutions
| If you don’t have… | Use instead… |
|---|---|
| All‑purpose flour | Whole‑wheat pastry flour (same amount) |
| Unsalted butter | Salted butter (reduce added salt by ¼ tsp) |
| Semi‑sweet chips | White chocolate chips or chopped nuts |
👨🍳 Step‑by‑Step Instructions
Follow these detailed steps to create perfectly balanced cookie bars that are golden on the edges and luxuriously soft in the centre.
📋 Phase 1: Preparation & Mise en Place
Gather, measure, and combine the dry and wet components before the oven heats up.
Preheat the oven and prep the pan
Set your oven to 180 °C (350 °F) and line a 9×13‑inch (23×33 cm) baking pan with parchment paper, leaving an overhang on the sides for easy removal. Lightly grease the parchment with a thin brush of melted butter to prevent sticking.
Combine dry ingredients
In a medium bowl, whisk together the flour, baking soda, and salt. This ensures even distribution of leavening agents, preventing pockets of bitterness.
Cream butter and sugars
In a large mixing bowl, pour the melted butter, then add brown sugar and granulated sugar. Using a whisk or handheld mixer on low speed, blend until the mixture is smooth and glossy—about 30 seconds. The sugar will dissolve slightly, giving the batter a silky texture.
🔥 Phase 2: Mixing & Baking
Integrate the wet and dry components, fold in chocolate, and bake to perfection.
Add egg and vanilla
Beat the egg into the butter‑sugar mixture, followed by the vanilla extract. Mix just until incorporated; the batter will look slightly glossy and thick.
Incorporate dry ingredients
Gradually add the flour mixture to the wet ingredients, stirring with a rubber spatula until just combined. Over‑mixing will develop gluten, leading to a tougher bar.
Fold in chocolate chips
Gently fold the semi‑sweet chocolate chips throughout the batter, ensuring an even distribution. If you love extra chocolate, feel free to add an additional 50 g.
Spread batter and bake
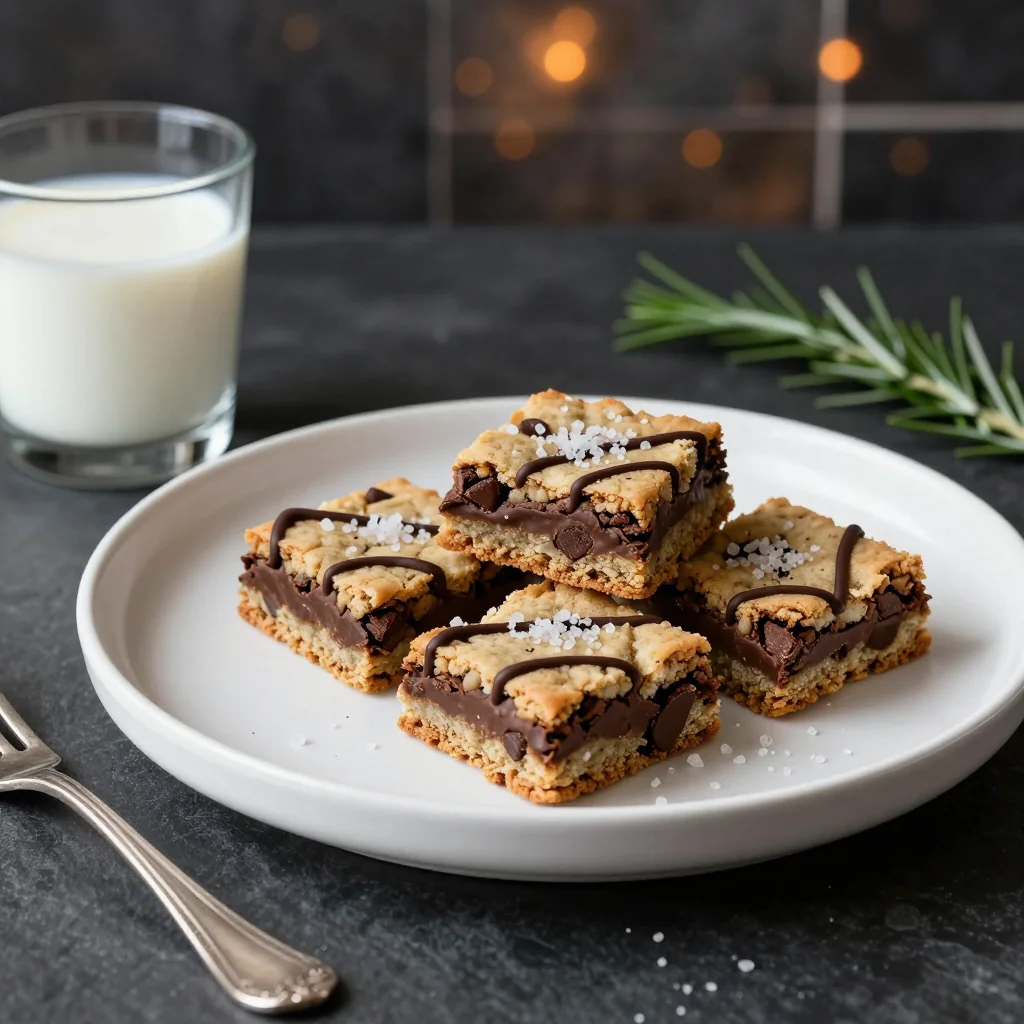
Transfer the batter into the prepared pan, spreading it into an even layer with a spatula. Sprinkle a pinch of sea salt over the top for a subtle contrast. Bake for 22‑25 minutes, or until the edges turn a light golden brown and a toothpick inserted into the centre comes out with a few moist crumbs.
✨ Phase 3: Finishing & Serving
Cool, cut, and present your bars for maximum enjoyment.
Cool before slicing
Allow the bars to cool completely in the pan on a wire rack—about 30 minutes. This resting period lets the structure set, preventing crumbling when you cut.
Slice into portions
Using the parchment overhang, lift the whole slab onto a cutting board. With a sharp knife, cut into twelve equal squares or rectangles, wiping the blade clean between cuts for neat edges.
Serve and enjoy
Serve the bars warm with a glass of cold milk, or at room temperature with a scoop of vanilla ice cream for an indulgent dessert. Store leftovers in an airtight container.
💡 Expert Tips & Tricks
🛒 Choosing the Right Ingredients
Opt for European‑style butter with a higher butterfat content; it yields a richer flavour and a softer crumb. When selecting chocolate chips, look for a brand that lists cocoa solids rather than just “chocolate” to ensure a genuine melt. If you can, buy chocolate in bulk and chop it yourself for larger, irregular chunks that create a more luxurious texture.
🔪 Preparation Techniques
Measure flour using the spoon‑and‑level method to avoid compacting it, which can make the bars dense. Melt butter gently over low heat or in the microwave in short bursts to prevent scorching. When folding chocolate chips, use a gentle “cut‑through” motion rather than stirring vigorously; this keeps the chips intact.
🌡️ Mastering the Bake
Every oven behaves slightly differently. If you notice the edges browning too quickly, tent the pan with foil after 15 minutes. Use an oven thermometer to confirm the temperature; a consistent 180 °C ensures even rise and a uniform crumb.
🍽️ Presentation & Service
For a polished look, dust the cooled bars lightly with powdered sugar or drizzle a thin glaze of melted chocolate. Serve on a rustic wooden board for a casual vibe, or on a marble slab for a more refined presentation. Pair with a dollop of whipped cream flavored with a hint of espresso for an upscale twist.
🏆 Pro Tips
Professional bakers rely on precise techniques that transform a good recipe into an exceptional one.
- 🎯 Control Moisture with Butter Temperature: Using melted butter rather than softened butter reduces the amount of trapped air, leading to a denser, chewier texture. The liquid butter also coats flour particles, limiting gluten formation.
- 🎯 Use a Light Hand with the Egg: Adding the egg gradually prevents the batter from splitting. The egg’s proteins coagulate during baking, providing structure without making the bars cakey.
- 🎯 Opt for a Lightly Greased Parchment Overhang: This technique allows you to lift the entire slab out of the pan without breaking the bars, preserving the clean edges that look professional on a plate.
- 🎯 Cool on a Wire Rack, Not in the Pan: Air circulation prevents steam from softening the bottom, which could otherwise become soggy.
- 🎯 Adjust Sweetness with Sugar Ratios: If you prefer a less sweet bar, reduce the granulated sugar to 80 g while keeping the brown sugar at 100 g for moisture.
- 🎯 Finish with a Salt Sprinkle: A tiny pinch of flaky sea salt right before baking creates a flavor contrast that highlights the chocolate’s sweetness, a technique used by top pastry chefs.
"A great cookie bar is a balance of texture, flavor, and timing; master each and the result is pure comfort." — Dominique Ansel
🔄 Variations & Adaptations
The base recipe is a versatile canvas. Below are ideas to tailor it to different dietary preferences, flavor cravings, and occasions.
🥬 Vegetarian / Vegan Version
Replace the egg with a “flax egg” (1 tbsp ground flaxseed mixed with 3 tbsp water, let sit 5 minutes). Use a plant‑based butter alternative and ensure the chocolate chips are dairy‑free. The texture remains chewy, and the flavour stays rich.
- Flax egg provides binding similar to an egg.
- Vegan butter should be at room temperature to melt smoothly.
🌶️ Flavor Variations
Play with additional flavour layers to keep the recipe exciting.
Spicy Kick:
Stir in ½ tsp of cayenne pepper or a pinch of smoked paprika for a subtle heat that pairs beautifully with chocolate.
Mediterranean Twist:
Add ¼ cup of chopped dried apricots and 2 tbsp of toasted pine nuts for a sweet‑savory Mediterranean flair.
Asian Inspiration:
Incorporate 1 tsp of matcha powder into the batter and sprinkle toasted sesame seeds on top before baking for a green‑tea‑infused bar.
⚠️ Dietary Adaptations
Gluten‑Free:
Swap all‑purpose flour for a 1‑to‑1 gluten‑free flour blend; add a ½ tsp xanthan gum if your blend lacks it.
Lactose‑Free:
Use a high‑quality dairy‑free butter and ensure chocolate chips are labeled “dairy‑free”.
Low‑Calorie:
Reduce butter to 100 g, replace half the brown sugar with a natural sweetener like stevia, and use dark chocolate chips (70 % cacao) for a richer flavour with less sugar.
👶 Kid‑Friendly Version
Kids love extra chocolate! Double the chocolate chips and add a swirl of caramel sauce after baking. Reduce the salt to a pinch and serve with a side of fresh strawberries for a balanced snack.
📦 Storage & Reheating
🧊 Conservation
Refrigerator:
- Duration: 5 days
- Container: Airtight plastic or glass container
- Tip: Place a sheet of parchment between layers to avoid sticking.
Freezer:
- Duration: 2 months
- Method: Wrap the entire pan tightly in foil, then place in a freezer‑safe bag.
- Defrosting: Transfer to the refrigerator overnight or microwave individual pieces for 15‑20 seconds.
💡 For maximum freshness, allow frozen bars to come to room temperature before slicing; this prevents crumbly edges.
♨️ Reheating
🔥 Oven (Recommended):
- Preheat to 160 °C (325 °F).
- Cover the pan loosely with aluminium foil.
- Reheat for 8‑10 minutes.
- Remove foil and continue for 2‑3 minutes to crisp the edges.
⚡ Microwave (Quick):
- Place a single bar on a microwave‑safe plate.
- Cover with a microwave‑safe lid.
- Heat on medium power for 30‑45 seconds.
- Check and repeat in 10‑second bursts if needed.
🍳 Skillet:
Heat a non‑stick skillet over low heat, place a bar, and cover for 2‑3 minutes. This method revives the chewiness without drying the centre.
🍷 Perfect Pairings
🥗 Side Dishes
- Fresh Berry Salad: A mix of strawberries, blueberries, and mint adds a bright, acidic contrast.
- Vanilla Yogurt Dip: Lightly sweetened Greek yogurt with a hint of vanilla balances the richness.
- Caramelized Bananas: Sauté sliced bananas in butter and brown sugar for a warm, complementary topping.
🍷 Wine & Beverage Pairings
- Milk Chocolate Stout: Its creamy mouthfeel mirrors the bar’s texture while the malt notes enhance chocolate.
- Late Harvest Riesling: The natural sweetness and acidity cut through the buttery richness.
- Non‑Alcoholic: Sparkling apple cider with a splash of cinnamon adds festive fizz.
🍰 Complementary Courses
Start with a light citrus sorbet to cleanse the palate, followed by the cookie bars, and finish with a drizzle of espresso‑infused chocolate ganache for an indulgent after‑dinner treat.
❓ Frequently Asked Questions
Q: Can I use melted butter instead of softened butter?
A: Absolutely. Melted butter creates a denser, chewier crumb because it coats the flour and limits gluten formation. Just be sure the butter is not hot when you mix it with the sugars, or it may cook the egg.
Q: How do I prevent the bars from spreading too thin?
A: Ensure the butter is fully incorporated but not overly aerated, and chill the dough for 15‑20 minutes before spreading. This firms the fat, limiting spread during baking.
Q: What if I don’t have parchment paper?
A: Lightly butter and flour the pan, or line it with a silicone baking mat. The bars may stick slightly more, but they’ll still release cleanly if you let them cool fully.
Q: My bars turned out too cakey—what went wrong?
A: Over‑mixing the batter introduces excess gluten, leading to a cake‑like texture. Mix just until ingredients are combined, and avoid using a high‑speed mixer for the dry‑wet integration step.
Q: Can I add nuts without affecting the texture?
A: Yes. Fold in up to ½ cup of toasted walnuts, pecans, or almonds. They add crunch without making the bars dry, provided you don’t exceed the suggested amount.
Q: Is it safe to prepare the batter a day ahead?
A: The batter can be refrigerated, covered, for up to 12 hours. Bring it to room temperature before spreading, and you may need to add a splash of milk if it thickens too much.
🎉 To Your Oven!
These Chocolate Chip Cookie Bars combine the nostalgic comfort of a classic cookie with the convenience of a slice‑and‑serve dessert. By mastering the balance of butter, sugars, and chocolate, you’ll achieve a bar that’s golden at the edges, soft and chewy inside, and endlessly adaptable to flavors, diets, and occasions. Whether you’re feeding a crowd or treating yourself, this recipe delivers consistent, crowd‑pleasing results every time.
Give the recipe a try, experiment with the variations, and share your creations in the comments below. Your feedback helps refine the guide, and your photos might be featured in our next post!
Have you tried this recipe?
Leave a comment and rating below! Share your photos on Instagram with #CookieBarMagic for a chance to be highlighted on our site.
Chocolate Chip Cookie Bars
Soft, chewy bars packed with melty chocolate chips – perfect for any occasion.
📝 Ingredients
Cookie Base
Chocolate Chips
Optional Garnish
👨🍳 Instructions
- 1
Preheat oven to 180 °C (350 °F) and line a 9×13‑inch pan with parchment.
- 2
Whisk flour, baking soda, and salt together.
- 3
Mix melted butter with brown and white sugar until glossy.
- 4
Beat in egg and vanilla.
- 5
Fold dry ingredients into wet mixture just until combined.
- 6
Stir in chocolate chips evenly.
- 7
Spread batter in pan, sprinkle sea salt, and bake 22‑25 minutes.
- 8
Cool completely, then lift using parchment and cut into 12 squares.
- 9
Serve warm with milk or ice cream, or store airtight.
- 10
Enjoy and share with friends!
🥗 Nutritional Information (per serving)
*Values are estimates based on standard ingredients.
📚 You Might Also Like
Classic Oatmeal Raisin Cookies
Double Chocolate Brownie Bars
Lemon Blueberry Muffins


💬 Comments & Reviews
Leave a Comment
[User comments will appear here]