Okay, let me set the scene: it was a rainy Saturday, the kind of day where the clouds look like they’re about to pour a bowl of caramel over everything. I was halfway through a marathon of sitcom reruns when a sudden craving hit me like a bolt of lightning—something sweet, buttery, and with a little crunch that could make even the grumpiest uncle smile. I raided the pantry, found a lone bag of pecans, a stick of butter that was practically melting in my hand, and thought, “Why not make pralines?” Little did I know I was about to stumble onto the most addictive version of this Southern classic.
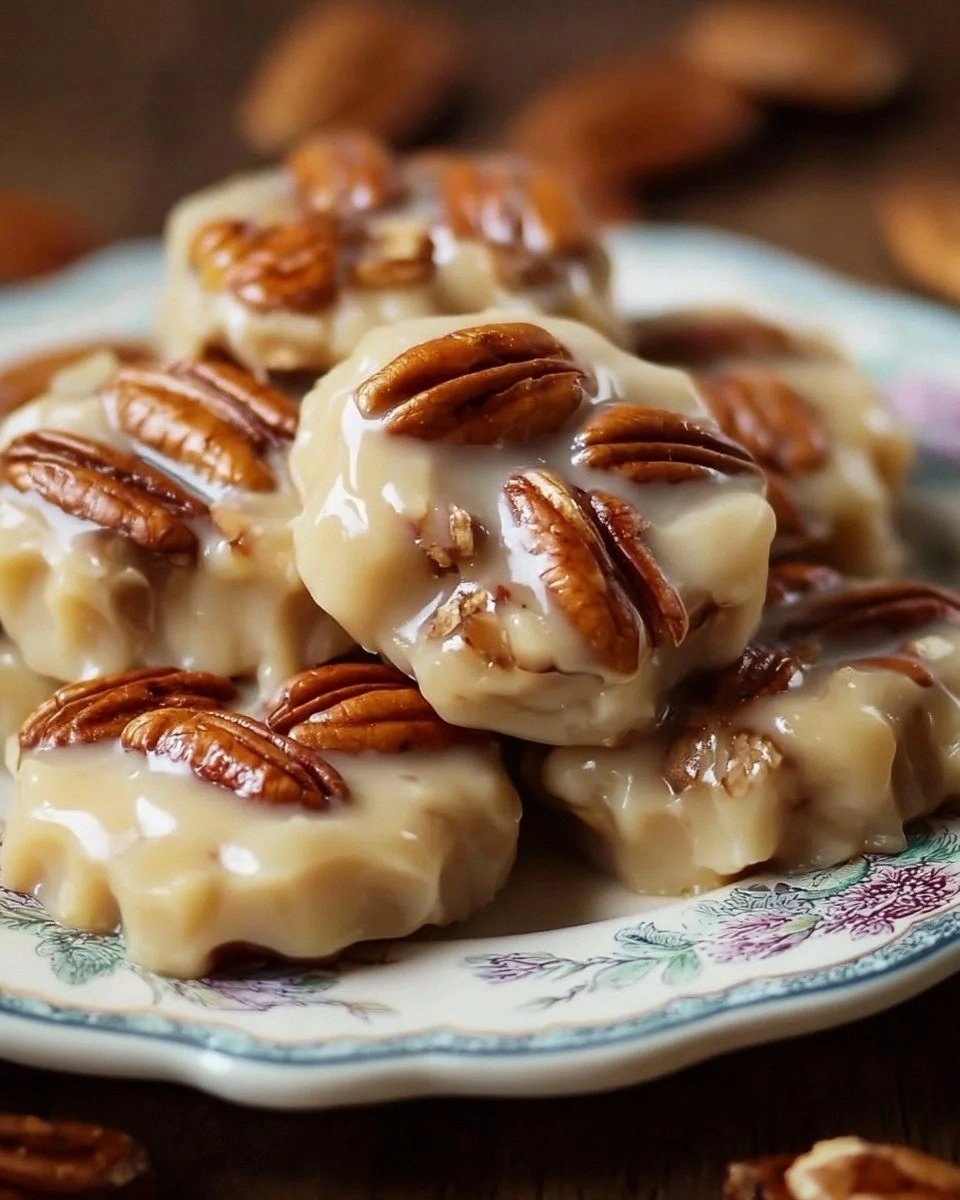
The kitchen quickly turned into a sensory playground. The butter hit the pan with a sizzle that sounded like applause, the sugar began to melt into a glossy amber river, and the vanilla extract floated up like a fragrant whisper. My nose was hit with a buttery, caramelized perfume that made the whole house feel like a boutique candy shop. When the pecans finally joined the party, they toasted to a deep, nutty aroma that made my stomach do a little happy dance. The texture? Imagine a cloud that’s been brushed with sugar crystals—soft, buttery, and just the right amount of crunch to keep you coming back for more.
Most recipes I’ve tried either end up too hard, too soft, or just plain bland. This version? Hands down the best version you’ll ever make at home. The secret is a simple balance of butter, cream, and vanilla that creates a glossy coating that clings to each pecan like a lover’s embrace. I’ll be honest— I ate half the batch before anyone else got a chance to try it, and that’s a confession I’m willing to own because the flavor is that good. I dare you to taste this and not go back for seconds; I guarantee you’ll be hooked.
There’s a tiny twist hidden in this recipe that most people completely overlook: a pinch of salt right at the end, which acts like a flavor amplifier, turning the sweet notes into something multidimensional. Picture yourself pulling these pralines out of the pan, the whole kitchen smelling like a caramel dream, and the first bite melting on your tongue while the pecan crunch sings a perfect counterpoint. Let me walk you through every single step — by the end, you’ll wonder how you ever made it any other way.
What Makes This Version Stand Out
- Flavor Explosion: The combination of vanilla and a splash of heavy cream creates a buttery sauce that coats each pecan like a silky veil, delivering a deep caramel flavor that lingers.
- Texture Harmony: You get that melt‑in‑your‑mouth softness on the inside with a delicate, crackly exterior that shatters like thin ice when you bite.
- Simplicity: Only six ingredients, five of which you probably already have, meaning you can whip these up in under an hour without a trip to the specialty store.
- Unique Twist: A pinch of salt added at the very end amplifies the sweetness and adds a subtle savory note that most recipes miss.
- Crowd‑Pleaser: Whether it’s a holiday gathering or a casual movie night, these pralines disappear faster than you can say “one more bite.”
- Ingredient Quality: Using real vanilla extract (alcohol‑free) and fresh, unsalted butter makes the flavor pure and unmasked by additives.
- Cooking Method: The stovetop caramel technique gives you total control over the color and consistency, preventing the dreaded grainy texture.
- Make‑Ahead Potential: Store them in an airtight container for up to a week, and they’ll stay crunchy and buttery—perfect for gifting or prepping ahead of a party.
Alright, let's break down exactly what goes into this masterpiece...
Inside the Ingredient List
The Flavor Base
Granulated sugar is the heart of any praline, providing the sweet foundation that transforms into caramel under heat. If you skip it or cut the amount, you’ll end up with a bland, under‑caramelized treat that feels more like a sugary butter spread than a true praline. For a deeper flavor, you can swap half of the white sugar with light brown sugar, which adds a whisper of molasses. When selecting sugar, choose a fine‑grained variety so it dissolves evenly without grainy pockets.
The Texture Crew
Unsalted butter brings richness and a velvety mouthfeel; using salted butter would throw off the delicate balance and make the final pinch of salt redundant. Heavy cream adds a luxurious silkiness that prevents the caramel from hardening too quickly, giving the pralines that signature soft‑crack texture. If you’re out of heavy cream, a mixture of half‑and‑half and a splash of milk will work, but expect a slightly less buttery finish.
The Unexpected Star
Vanilla extract (alcohol‑free) is the secret whisper that elevates the caramel from “good” to “gourmet.” It infuses the sauce with a floral, sweet note that pairs perfectly with the nutty pecans. If you’re feeling adventurous, a dash of bourbon or rum can replace half the vanilla for an adult‑only twist, but the pure vanilla keeps the flavor clean and bright.
The Final Flourish
Chopped pecans are the star of the show, providing crunch, earthiness, and a buttery richness that balances the sweet sauce. Choose raw, unsalted pecans for the best texture; toasted pecans can be used, but they’ll introduce a smoky flavor that might compete with the vanilla. A pinch of salt added at the end is the final flourish—think of it as the culinary equivalent of a high‑note in a song, making every other flavor sing louder.
Everything's prepped? Good. Let's get into the real action...
The Method — Step by Step
Gather all six ingredients, measure them precisely, and have a heat‑proof spatula ready. I dare you to taste this and not go back for seconds, so make sure you’re set before the magic begins. The pan you choose matters—a heavy‑bottomed saucepan will distribute heat evenly, preventing hot spots that can scorch the sugar.
Kitchen Hack: Use a candy thermometer; once the caramel hits 250°F (121°C) you’re in the perfect window for a glossy, non‑grainy finish.Melt the butter over medium heat until it foams, then add the granulated sugar. Stir continuously with a wooden spoon; the mixture will begin to bubble and turn a light amber. This stage is crucial—if you rush it, the sugar can crystallize, turning your pralines into a gritty mess.
When the sugar is fully dissolved and the mixture looks like liquid gold, carefully pour in the heavy cream. The pan will hiss and steam, and the caramel will briefly bubble over—don’t panic, that’s normal. Stir gently until the cream is fully incorporated; the sauce should become silky and smooth.
Watch Out: Adding the cream too quickly can cause the caramel to seize; pour in a thin, steady stream while whisking constantly.Stir in the vanilla extract and a pinch of salt. This is the moment of truth—the vanilla should perfume the kitchen like a warm hug, and the salt will start to bring out the depth of the caramel.
Add the chopped pecans, folding them in until every piece is fully coated. You’ll notice the mixture thickening slightly as the nuts absorb the buttery sauce. Keep the heat on low; you want the pecans to toast just enough to release their oils without burning.
Now, the crucial part: watch the edges of the caramel as they begin to pull away from the pan and form a thin, glossy film. This is your visual cue that the praline mixture is ready to be dropped. If you’re using a thermometer, you should be hovering around 260°F (127°C).
Remove the pan from heat and let the mixture sit for about 30 seconds to cool just enough that it can be handled. Then, using a spoon or small ice‑cream scoop, drop dollops onto a parchment‑lined baking sheet. The droplets should spread slightly, forming a perfect dome with a slightly cracked top.
Kitchen Hack: Chill a metal spoon in the freezer for 5 minutes; it helps you scoop the hot mixture without burning and gives each praline a uniform size.Allow the pralines to set at room temperature for 15‑20 minutes, or until the surface is firm to the touch. Resist the urge to move them too early; they need that final “crackle” to form. Once set, store them in an airtight container, and watch as they disappear one by one.
That's it — you did it. But hold on, I've got a few more tricks that'll take this to another level...
Insider Tricks for Flawless Results
The Temperature Rule Nobody Follows
Most home cooks eyeball caramel, but a candy thermometer is the real game‑changer. When the sauce reaches 250‑260°F, you know the sugar polymers have aligned just right for a glossy finish that won’t turn grainy. If you’re without a thermometer, watch for the “soft‑ball” stage: drop a tiny spoonful into cold water; it should form a soft ball that flattens when pressed. I once skipped this step and ended up with a hard, glass‑like crust that shattered like brittle ice—never again.
Why Your Nose Knows Best
Your sense of smell is a far more reliable indicator than a timer. As soon as the caramel starts to emit a buttery, toasted aroma, you’re approaching the perfect moment. If the scent turns slightly burnt, pull the pan off the heat immediately. Trusting your nose saved me from a batch that tasted like over‑cooked sugar, and it’s a habit you’ll thank yourself for.
The 5‑Minute Rest That Changes Everything
After you’ve dropped the praline dollops, let them sit untouched for exactly five minutes before moving them. This short rest allows the sugar crystals to settle, creating that signature crackly surface. Skipping this rest results in a gummy texture that never fully sets. I once tried to speed‑up the process for a party and the pralines turned into sticky blobs—lesson learned.
Cool‑Down on Marble
If you have a marble countertop, spread the parchment sheet on it for the final cooling phase. Marble draws heat away faster than wood or ceramic, giving the pralines a tighter crunch. It’s a subtle trick that professional pastry chefs swear by, and it’s especially useful when you’re making a large batch.
Salt at the End, Not the Beginning
Adding the pinch of salt at the very end, after the caramel has formed, maximizes its ability to brighten the flavors. If you sprinkle it too early, the salt can dissolve into the butter and lose its impact. This final dash is like the last brushstroke on a painting—tiny but transformative.
Creative Twists and Variations
This recipe is a playground. Here are some of my favorite ways to switch things up:
Maple‑Brown Sugar Delight
Swap half the granulated sugar for pure maple syrup and add a tablespoon of dark brown sugar. The result is a deeper, autumnal flavor that pairs beautifully with the pecans. Perfect for a cozy fall gathering.
Chocolate‑Swirl Surprise
Stir in a quarter cup of melted dark chocolate right after you add the vanilla. The chocolate creates marbled ribbons throughout the caramel, giving each bite a bittersweet contrast that chocolate lovers will adore.
Spiced Cinnamon Kick
Add a pinch of ground cinnamon and a dash of nutmeg to the sugar‑butter mixture. The warm spices elevate the pralines into a holiday‑ready treat without overpowering the vanilla.
Coconut‑Infused Dream
Replace half the pecans with toasted shredded coconut and drizzle a tiny bit of coconut‑flavored rum over the finished pralines. This tropical twist brings a chewy texture that balances the crisp pecans.
Salted Caramel Crunch
Increase the pinch of salt to a light sprinkle of flaky sea salt just before the pralines set. The extra salt creates a delightful contrast, turning each bite into a sweet‑and‑salty experience that’s pure indulgence.
Storing and Bringing It Back to Life
Fridge Storage
Place the cooled pralines in an airtight container lined with parchment paper. They’ll stay fresh for up to five days in the refrigerator. If you notice any condensation, gently pat the tops with a paper towel before resealing.
Freezer Friendly
For longer storage, arrange the pralines on a baking sheet, flash freeze for 20 minutes, then transfer them to a zip‑top freezer bag. They keep for up to three months. When you’re ready to enjoy them, let them thaw at room temperature for 10 minutes, and they’ll retain their original crunch.
Best Reheating Method
If your pralines have softened, place them on a parchment sheet and warm them in a 300°F (150°C) oven for 5‑7 minutes. Add a tiny splash of water (about a teaspoon) to the pan before reheating; the steam will revive the caramel’s glossy sheen without making them soggy.