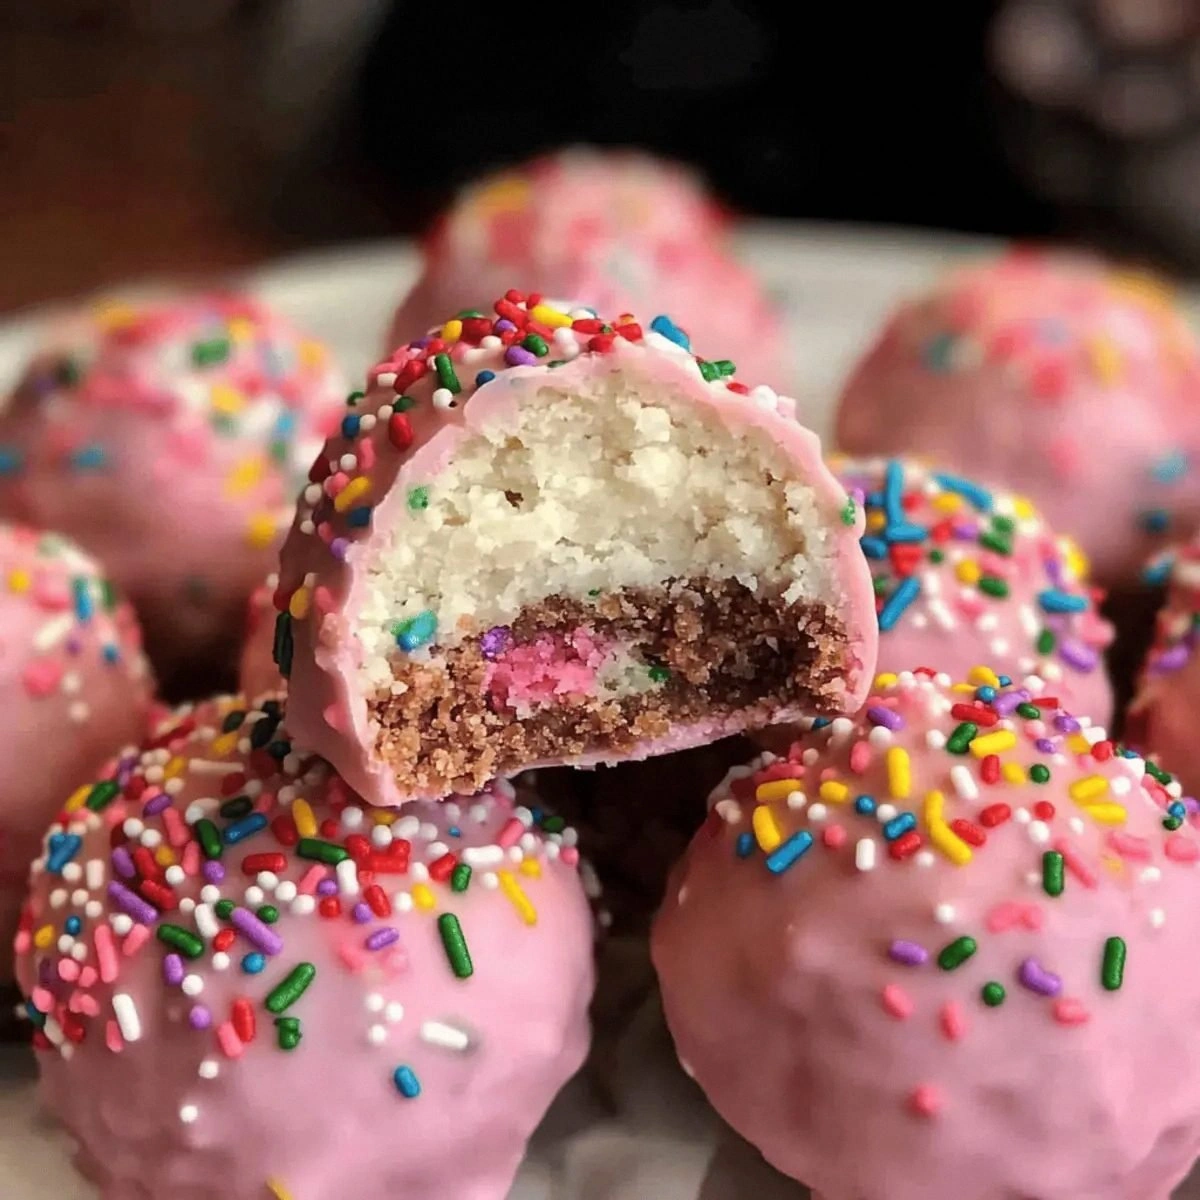
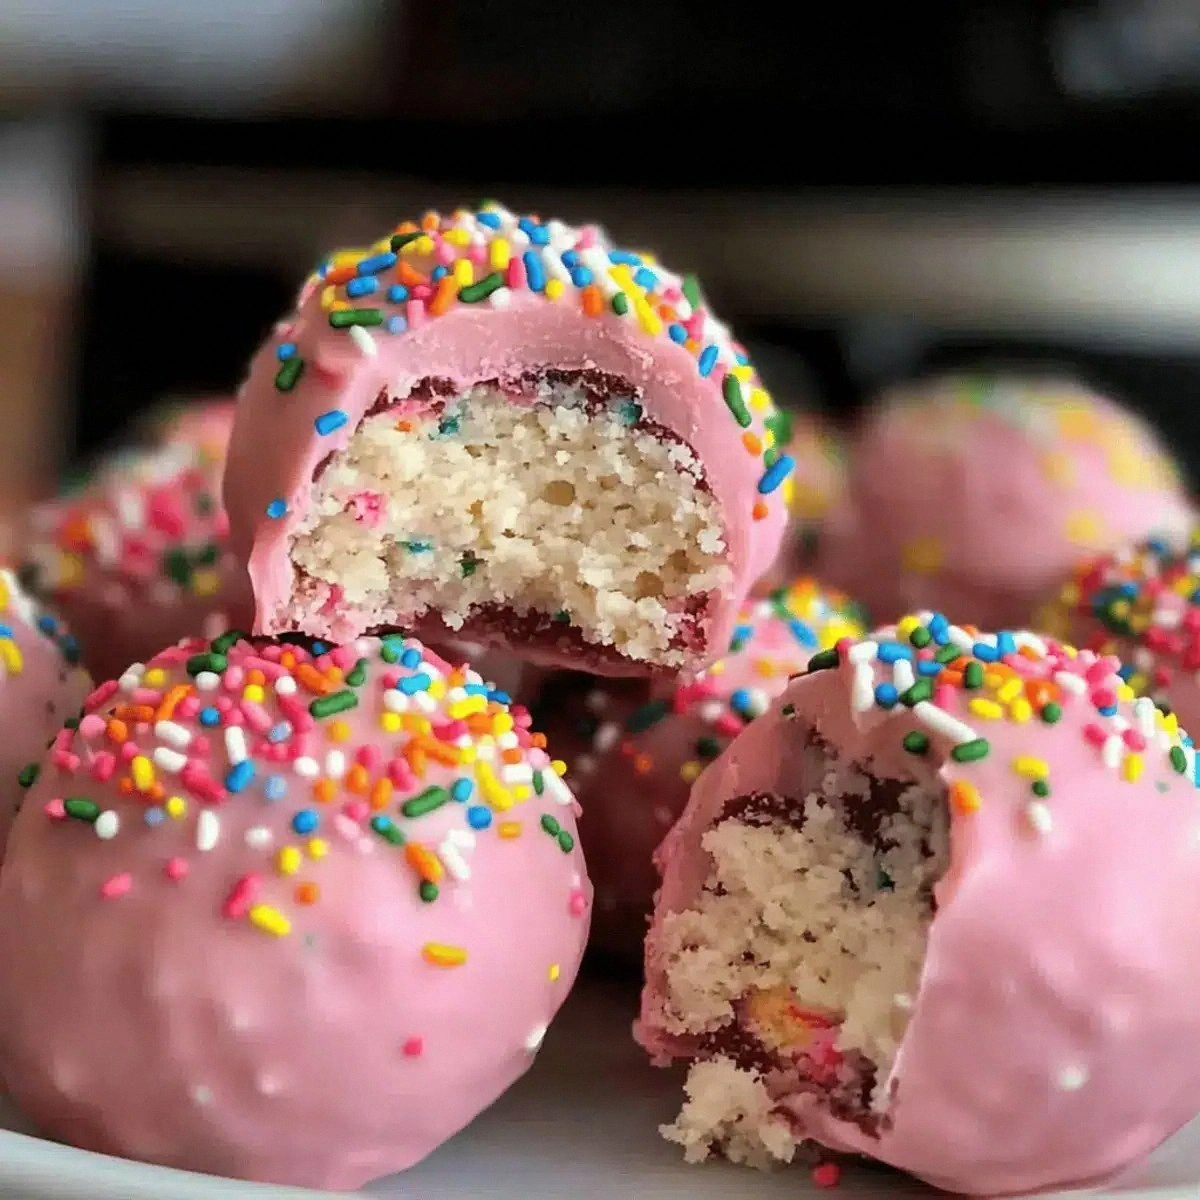
I was standing in my kitchen on a rainy Tuesday, staring at a half‑empty bag of frosted animal crackers and a tub of cream cheese that had been staring back at me like a dare. My roommate had just challenged me to create a “circus‑themed” dessert that would wow our friends at the upcoming game night, and I was already three minutes into a mental breakdown about how to make something that didn’t involve an oven. Then, like a flash of neon on a circus tent, the idea hit me: why not turn those crunchy critters into bite‑size truffles, coat them in candy‑colored melts, and sprinkle them with rainbow confetti? The mental image was so vivid I could almost taste the buttery crunch meeting the silky melt, and the thought of the kids’ eyes widening made my heart do a little somersault.
I tossed the crackers into a food processor, feeling the blades whirr like a carousel horse on a loop, and watched the crumbs cascade like confetti at a parade. The scent of the frosted sugar‑coated crackers filled the air, sweet and buttery, while the cream cheese melted in my hand like a cloud of silk. I could hear the faint hum of the refrigerator and the occasional clatter of a spoon against a ceramic bowl, each sound punctuating the rhythm of creation. My fingertips tingled as the mixture came together, warm and pliable, promising a texture that would be both crumbly and creamy—a perfect marriage of crunch and melt.
What makes this version truly stand out is the simplicity of the technique paired with a visual punch that screams “party”. Most recipes I’ve tried either require a bake‑off that leaves my kitchen smelling like a burnt sugar factory, or they rely on a gelatin base that feels more like a science experiment than a treat. This no‑bake method respects the integrity of the animal crackers while elevating them with a glossy candy‑melt coating that sets up like a mirror‑smooth lake. I’ll be honest — I ate half the batch before anyone else got a chance to try, and that was the most delicious act of selfishness you could imagine.
The secret weapon? A splash of pink candy melt that adds a subtle strawberry‑kissed undertone, and a separate white melt that gives each truffle a clean, glossy finish. Most people skip the white coating, thinking the pink alone is enough, but the contrast is what makes the truffles look like tiny circus tents ready for a performance. I dare you to taste this and not go back for seconds; the combination of flavors is so balanced it feels like a well‑orchestrated act under the big top.
Let me walk you through every single step — by the end, you’ll wonder how you ever made it any other way. Okay, ready for the game‑changer? This next part? Pure magic. Stay with me here — this is worth it.
What Makes This Version Stand Out
- Taste: The sweet, buttery crunch of the animal crackers pairs with a silky, slightly salty cream cheese core, creating a flavor dance that’s both nostalgic and sophisticated.
- Texture: Imagine a crunchy exterior that yields to a creamy, melt‑in‑your‑mouth center—like biting into a cloud that’s been wrapped in a crisp cookie shell.
- Simplicity: No oven, no complicated equipment, just a bowl, a spatula, and a microwave for the melts. If you can melt chocolate, you can master this.
- Uniqueness: The two‑tone coating (pink and white) makes each truffle look like a tiny circus tent, perfect for themed parties or a whimsical dessert spread.
- Crowd Reaction: Guests usually ask for the recipe within five minutes of the first bite, and the “wow” factor is off the charts.
- Ingredient Quality: Using premium frosted animal crackers and real cream cheese gives a richer taste than generic substitutes.
- Method: The no‑bake approach preserves the crackers’ delicate structure while still achieving a firm, set finish.
- Make‑Ahead Potential: These truffles keep for up to a week in the fridge, so you can prep them ahead of any celebration.
Alright, let's break down exactly what goes into this masterpiece...
Inside the Ingredient List
The Flavor Base
The 8 ounces of frosted animal crackers are the backbone of this recipe. Their sugary coating provides a subtle caramel note that elevates the overall sweetness without overwhelming the palate. If you skip them, you lose that nostalgic crunch that makes the truffles feel like a childhood memory wrapped in adult elegance. For a gluten‑free alternative, try gluten‑free graham cracker crumbs; they’ll give a similar texture but a slightly different flavor profile.
The Texture Crew
Cream cheese, also at 8 ounces, is the glue that holds everything together. Its tangy richness cuts through the sweetness of the crackers, creating a balanced bite that doesn’t feel cloying. If you’re looking for a dairy‑free version, swap the cream cheese with a plant‑based cream cheese; just be aware the texture might be a tad softer, so chill the mixture a bit longer before shaping.
The Unexpected Star
Pink candy melts (1 cup) bring a pop of color and a whisper of strawberry flavor that’s more visual than gustatory, but the subtle fruitiness adds depth. You can use white chocolate almond bark instead of white candy melts for a nutty undertone that pairs beautifully with the pink. If you’re allergic to nuts, stick with pure white candy melts; the flavor will still be clean and buttery.
The Final Flourish
Rainbow sprinkles (1 cup) are the confetti that turns an ordinary truffle into a circus spectacle. They add a crunchy contrast to the smooth melt coating and a burst of color that makes each bite feel festive. If you’re aiming for a more refined look, swap the sprinkles for finely chopped toasted almonds or toasted coconut flakes; the flavor will shift toward nutty or tropical, respectively.
Everything's prepped? Good. Let's get into the real action...
The Method — Step by Step
First, line a large mixing bowl with parchment paper and set your food processor to pulse. Toss the 8 ounces of frosted animal crackers into the bowl; you’ll hear a satisfying crunch as they tumble. Pulse until the crumbs are fine but still retain a hint of texture—think coarse sand at the beach. Power transition: Okay, ready for the game‑changer? This crumb base is the canvas for everything that follows.
Add the 8 ounces of softened cream cheese to the crumb mixture. Using a rubber spatula, fold the cheese into the crumbs until the mixture becomes a cohesive, pliable dough that holds together when pressed. It should feel cool and slightly sticky, like a well‑kissed marshmallow.
Kitchen Hack: Chill the dough for 10 minutes before shaping; it makes rolling into balls a breeze.While the dough rests, prepare your candy melts. Place the pink candy melts in a microwave‑safe bowl, cover loosely, and melt in 30‑second bursts, stirring between each burst until smooth. The melt should be glossy and fluid, not grainy. The aroma of melting chocolate will fill the kitchen, a scent that signals you’re about to create something spectacular.
Now, shape the dough. Using a tablespoon or a small ice‑cream scoop, portion out the mixture and roll each piece between your palms into a smooth ball about the size of a walnut. The texture should be firm enough to hold its shape but soft enough to give a little when you press it. Watch Out: If the balls are too soft, they’ll lose their shape during coating; chill them a few minutes longer.
Line a second sheet of parchment with the melted pink candy melt, using a silicone brush to spread a thin layer. Gently dip each ball into the pink melt, turning it to coat all sides. Let excess melt drip back into the bowl—this ensures a thin, even coating that won’t crack later. Place the coated truffle on a fresh parchment sheet and set aside.
While the pink coating is still tacky, sprinkle a generous handful of rainbow sprinkles over each truffle. The sprinkles will adhere perfectly to the semi‑set pink layer, creating a colorful, crunchy crown. If you prefer a cleaner look, you can skip the sprinkles and move straight to the white melt.
Next, melt the white candy melts (or white chocolate almond bark) using the same microwave technique as before. Once glossy, dip each pink‑coated truffle into the white melt, allowing the white layer to envelop the pink and sprinkles. This double‑coat creates a glossy finish that looks like a polished circus tent under the spotlight.
After the final dip, give each truffle a quick roll on a plate of additional rainbow sprinkles for a final burst of color. Transfer the finished truffles to a parchment‑lined tray and let them set at room temperature for 15‑20 minutes, or pop them in the fridge for a faster set. Power transition: And now the fun part—watching them harden into little works of art.
Once set, arrange the truffles on a serving platter. The glossy white coat reflects light, making the rainbow speckles pop like fireworks. Serve immediately, or store in an airtight container. If you’re feeling extra theatrical, dust a pinch of edible glitter on top for that extra circus sparkle.
That’s it — you did it. But hold on, I’ve got a few more tricks that’ll take this to another level. Stay with me here — this is worth it.
Insider Tricks for Flawless Results
The Temperature Rule Nobody Follows
Never melt candy melts over high heat. Keep the microwave intervals short (15‑30 seconds) and stir constantly. This prevents scorching, which can cause a grainy texture that ruins the glossy finish. I once melted a whole cup in one go and ended up with a dull, clumpy coating that never set properly—lesson learned.
Why Your Nose Knows Best
When the pink melt is ready, you’ll notice a faint buttery aroma that signals it’s at the perfect temperature. If it smells too “cooked” or starts to emit a burnt scent, it’s already over. Trust your nose; it’s a more reliable indicator than a thermometer for candy melts.
The 5‑Minute Rest That Changes Everything
After shaping the dough balls, let them rest for at least five minutes before coating. This short chill firms the interior, preventing the truffle from cracking when you dip it. A friend tried to skip this step once; the truffles split open like over‑inflated balloons, and the mess was epic.
The Double‑Coat Secret
The key to a flawless double coat is timing. The pink layer must be tacky but not fully set before you add the white melt. If the pink is too hard, the white won’t adhere; if it’s too runny, the colors will bleed together. A quick test: touch the pink with a fingertip—if it leaves a faint imprint that springs back, you’re good to go.
The Sprinkles Stick Trick
For the sprinkles to cling perfectly, lightly dust the pink coating with a pinch of cornstarch before adding the white melt. The starch acts like a microscopic Velcro, ensuring the sprinkles don’t fall off during the final dip. It’s a tiny step that makes a massive difference in presentation.
The Chill‑Before‑Serve Boost
Even though these truffles are best at room temperature, a quick 10‑minute chill before serving makes the coating snap when bitten, giving that satisfying “crack” sensation. I love the contrast of a cold exterior with a warm, creamy center—it’s a texture party in your mouth.
Creative Twists and Variations
This recipe is a playground. Here are some of my favorite ways to switch things up:
Chocolate‑Covered Banana Bites
Swap the animal crackers for crushed banana chips and use dark chocolate melts for the outer coat. The result is a sophisticated, slightly salty‑sweet bite that’s perfect for a grown‑up gathering.
Matcha Green Dream
Replace the pink melt with matcha candy melts and finish with white chocolate drizzle. The earthy green pairs beautifully with the buttery cracker base, and the visual contrast is stunning.
Nutty Caramel Crunch
Add a drizzle of caramel sauce over the white coating and sprinkle toasted pecans on top. The caramel adds a rich, buttery depth while the nuts give an extra crunch that elevates the texture profile.
Holiday Red & Green
For a festive twist, use red and green candy melts instead of pink and white, and swap rainbow sprinkles for crushed peppermint candies. Perfect for a Christmas party where you want the truffles to match the décor.
Vegan Velvet
Go fully plant‑based by using vegan cream cheese and dairy‑free candy melts. The flavor remains just as decadent, and you’ll have a dessert that suits any dietary restriction without compromising on the circus vibe.
Storing and Bringing It Back to Life
Fridge Storage
Place the truffles in an airtight container lined with parchment paper. They’ll stay fresh for up to 7 days. The coating remains glossy, and the interior stays firm. If you notice any condensation, simply pat the tops dry with a paper towel before serving.
Freezer Friendly
These truffles freeze beautifully. Arrange them on a baking sheet, freeze solid for 2 hours, then transfer to a zip‑top bag. They’ll keep for up to 3 months. When you’re ready to serve, let them thaw in the fridge for an hour, then bring to room temperature for the best texture.
Best Reheating Method
To revive a chilled truffle, place it on a microwave‑safe plate, add a tiny splash of water (just a few drops), and microwave for 5‑10 seconds. The steam generated will melt the outer coat slightly, restoring that glossy shine and soft interior without making it soggy.