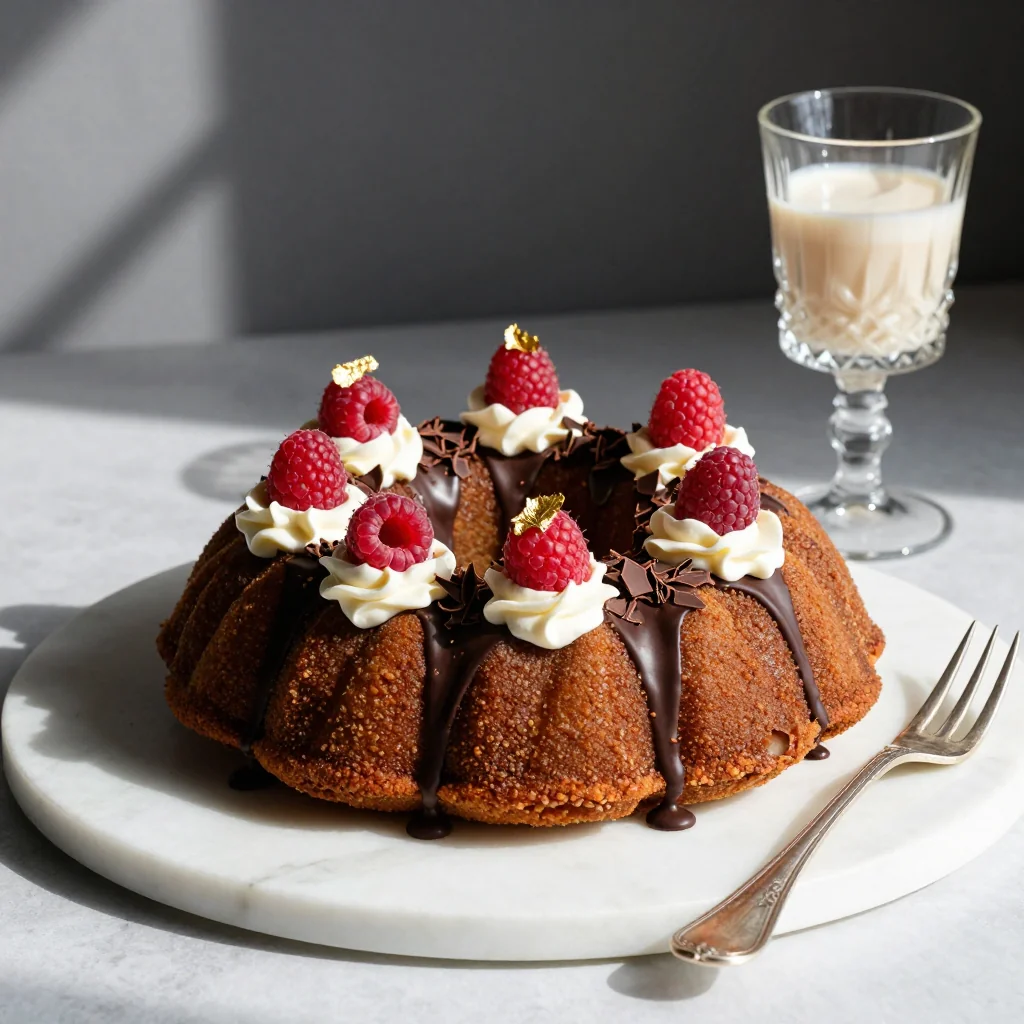
Picture this: it’s a rainy Saturday afternoon, the kind that makes you want to crawl under a blanket with a guilty‑pleasure dessert that feels like a hug from the inside. I was battling a sudden craving for something both elegant and downright indulgent, and after a disastrous attempt at a classic red velvet cake that turned out as flat as a pancake, I dared myself to reinvent the whole thing. I grabbed a pack of Oreo cookies, a tub of cream cheese, and a splash of red food coloring, and the kitchen erupted with the promise of something spectacular. I’ll be honest — I ate half the batch before anyone else got a chance to try it, but the moment I tasted the final slice, I knew I had stumbled upon the ultimate cheat‑code for dessert lovers.
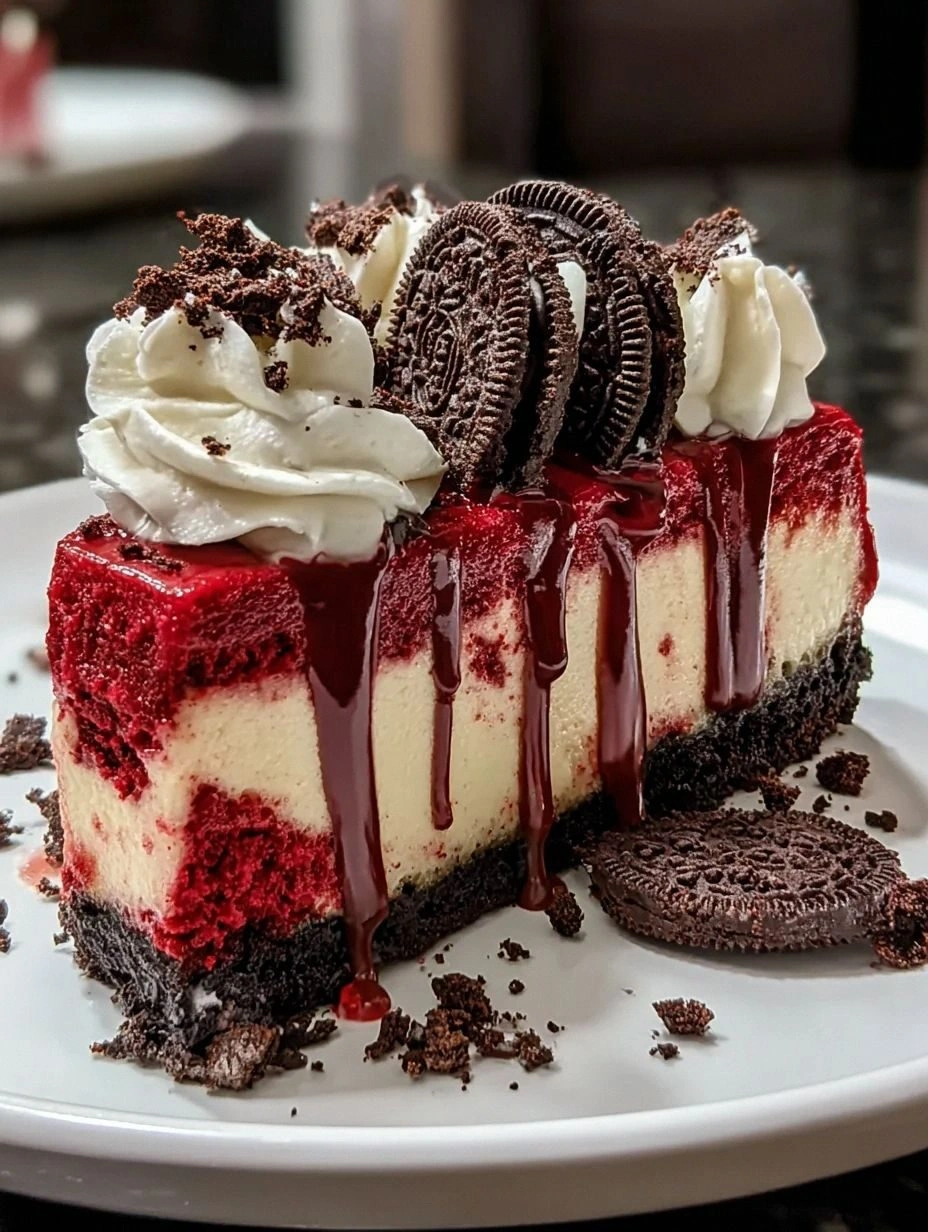
The moment the crust hit the pan, it sang a crunchy, chocolatey lullaby that made my oven timer feel like a drumbeat in a love song. The aroma of melted butter mingling with crushed Oreo crumbs rose like a perfume, and the deep red hue of the batter was so vivid it practically glowed in the dim light. As the cheesecake baked, a gentle, velvety steam escaped, wrapping the kitchen in a warm, sweet embrace that made my nose tingle with anticipation. When the timer finally chimed, the surface was a perfect, glossy canvas, waiting for a crown of airy whipped cream and a dusting of Oreo crumbs that crackled like fireworks on the tongue.
What sets this version apart from every other red velvet or Oreo cheesecake you’ve ever tried? First, the crust is a full‑on Oreo extravaganza, not just a bland graham base. Second, the filling balances the classic tang of cream cheese with a whisper of cocoa that deepens the red velvet flavor without turning it brown. Third, the whole thing is surprisingly simple—no fancy mixers or tempering tricks, just a handful of pantry staples and a few minutes of patience. And the best part? This is hands down the best version you’ll ever make at home, and I dare you to taste it and not go back for seconds.
Ready for the game‑changer? I’m about to walk you through every single step, from crushing cookies to the triumphant moment you pull that glossy, ruby‑red masterpiece out of the oven. By the end, you’ll wonder how you ever settled for anything less. Stay with me here — this is worth it.
What Makes This Version Stand Out
- Flavor Explosion: The marriage of rich Oreo crumbs with a subtly cocoa‑kissed red velvet filling creates a taste that’s both familiar and wildly new, like discovering a secret level in a video game.
- Texture Symphony: You get a crunchy, buttery crust that shatters like thin ice, a silky, dense cheesecake that holds its shape, and a fluffy whipped‑cream topping that melts like clouds.
- Simplicity Wins: No need for a food processor or a stand mixer; a zip‑top bag and a sturdy spoon do the trick, making this recipe accessible to even the most timid bakers.
- Visual Wow Factor: The vivid red hue paired with the black‑and‑white Oreo speckles looks like a work of art, guaranteeing applause at any gathering.
- Crowd‑Pleaser: Whether it’s a birthday, a brunch, or a midnight snack, this cheesecake draws people in like a magnet; I’ve seen strangers ask for the recipe before the first bite.
- Ingredient Quality: Using premium cream cheese and real Oreo cookies (not the generic substitutes) elevates the entire dessert, turning good into unforgettable.
- Make‑Ahead Magic: The cheesecake can sit in the fridge for up to 48 hours, allowing flavors to meld and intensify, which means you can prep ahead for any event.
- Versatile Base: The crust can be swapped for graham or chocolate wafer crumbs if you’re feeling adventurous, but the Oreo foundation remains the star.
Inside the Ingredient List
The Flavor Base
The heart of this cheesecake is the cream cheese, the dairy darling that gives it that luxurious, velvety texture. Using full‑fat cream cheese is non‑negotiable; low‑fat versions make the filling grainy and less rich. If you ever skip the cream cheese, you’ll end up with a dessert that feels more like a dense pudding than a cheesecake, and that’s a tragedy. For the best flavor, let the cheese soften at room temperature for at least 30 minutes before mixing—this prevents lumps and ensures a silky batter.
The Texture Crew
Unsalted butter is the silent hero that binds the Oreo crumbs into a sturdy crust. Melt it just enough to coat the crumbs without turning it brown; a golden hue is all you need. The butter’s fat content creates that melt‑in‑your‑mouth crunch that shatters like thin ice when you bite. If you’re watching calories, you can swap half the butter for coconut oil, but expect a subtle coconut aftertaste that may compete with the red velvet notes.
The Unexpected Star
Cocoa powder might seem like a minor player, but it’s the secret that keeps the red from turning brown while adding depth. Use a high‑quality Dutch‑process cocoa for a smoother finish. Skipping it will leave your cheesecake looking more pink than red, and the flavor will miss that subtle chocolate undertone that makes every bite feel like a celebration. A pinch of espresso powder can amplify the cocoa’s richness without making the dessert taste coffee‑y.
The Final Flourish
Red food coloring is the visual hero, giving this cheesecake its striking scarlet appearance. Don’t be shy—add a splash, then taste and adjust. Too much can make the flavor slightly bitter, so start with two tablespoons and add more if needed. Whipped cream on top adds a light, airy contrast, while Oreo crumbs sprinkled over the cream provide that satisfying crunch. Optional chocolate shavings add a decadent finish for chocolate lovers, turning the dessert into a multi‑layered masterpiece.
Everything's prepped? Good. Let’s get into the real action…
The Method — Step by Step
First, preheat your oven to 325°F (163°C). While the oven warms up, line the bottom of a 9‑inch springform pan with parchment paper. This ensures the cheesecake releases cleanly later, preventing those heartbreaking cracks that ruin the presentation. I like to give the pan a light spray of non‑stick spray, just in case. The kitchen will start to smell faintly buttery, a promising sign that we’re on the right track.
Next, crush the Oreo cookies. Place about 24 Oreo cookies (roughly 2 cups) into a zip‑top bag and use a rolling pin—preferably chilled—to pulverize them into fine crumbs. The texture should be like coarse sand, not a paste. Power transition: okay, now watch this part closely—add the melted butter (½ cup) to the crumbs and stir until every particle glistens. Press this mixture firmly into the pan, creating an even layer that will serve as the foundation for our masterpiece.
Kitchen Hack: Use the bottom of a measuring cup to press the crust down; it gives a perfectly flat surface without a lot of effort.While the crust sets, beat the softened cream cheese (24 oz) in a large mixing bowl until smooth—think cloud‑like, no lumps. Add the granulated sugar (1 cup) and continue beating until the mixture lightens in color, a visual cue that the sugar has dissolved. This step is crucial; if you skip it, you’ll get a gritty texture that feels like sand in your mouth. Then, add the vanilla extract (2 tsp) and mix briefly.
Now, incorporate the eggs—three large ones, one at a time. Add each egg and beat just until incorporated; over‑mixing can introduce too much air, leading to cracks later. After the eggs, blend in the sour cream (1 cup) and cocoa powder (2 tbsp). The batter should turn a deep, velvety red with a faint chocolate aroma. Finally, swirl in the red food coloring (2 tbsp) until the color is uniform. The batter should look like a luxurious ruby, ready to dazzle.
Pour the filling over the prepared crust, smoothing the top with an offset spatula. Tap the pan gently on the counter three times to release any trapped air bubbles—this is the moment of truth. The surface should be level, with a slight sheen that hints at the creamy interior awaiting the oven’s heat.
Place the springform pan inside a larger roasting pan, then pour hot water into the outer pan until it reaches halfway up the sides of the springform. This water bath, or bain‑marie, ensures gentle, even cooking and prevents the dreaded cracked top. Watch Out: If the water level is too low, the cheesecake will bake unevenly; too high and you risk water seeping into the crust.
Watch Out: Make sure the springform pan is tightly sealed to avoid water sneaking into the batter.Slide the whole assembly into the preheated oven and bake for 30‑35 minutes. The edges should look set and slightly puffed, while the center will still have a gentle wobble—this is exactly what you want. As the cheesecake bakes, the kitchen fills with a sweet, buttery fragrance that makes you want to peek inside every few minutes.
When the timer dings, turn off the oven, crack the door slightly, and let the cheesecake sit for 1 hour. This gradual cooling prevents sudden temperature drops that cause cracks. While it cools, the filling will continue to set, becoming firmer and more cohesive.
After the hour, remove the cheesecake from the water bath and let it cool completely on a wire rack. Then, cover it loosely with foil and refrigerate for at least 4 hours, preferably overnight. This chilling step is the secret weapon that locks in flavor and gives the texture that melt‑in‑your‑mouth feeling. Before serving, top with a generous dollop of whipped cream, a sprinkle of Oreo crumbs, and, if you’re feeling decadent, a handful of chocolate shavings.
Kitchen Hack: For an extra glossy finish, brush the top with a thin layer of melted white chocolate just before adding the whipped cream.
That's it — you did it. But hold on, I've got a few more tricks that'll take this to another level...
Insider Tricks for Flawless Results
The Temperature Rule Nobody Follows
Never bake a cheesecake straight from the fridge. Let the batter sit at room temperature for at least 30 minutes before it meets the oven. This small step prevents the edges from cooking faster than the center, which is the main cause of cracks. I once tried to skip this step in a hurry; the result was a cheesecake that resembled a cracked desert floor. Trust me, the extra patience pays off in a smooth, flawless surface.
Why Your Nose Knows Best
During baking, pay attention to the scent. When the edges start to smell toasty and the top releases a faint caramel note, you’re on the right track. If you detect a burnt smell early, lower the oven temperature by 10°F and add a few more minutes to the baking time. Your nose is a more reliable indicator than a timer alone, especially with ovens that run hot.
The 5‑Minute Rest That Changes Everything
After the cheesecake has cooled in the oven for an hour, let it sit on the counter for an additional five minutes before transferring it to the fridge. This brief pause allows the residual heat to distribute evenly, preventing a cold shock that can cause the crust to become soggy. I once rushed this step and ended up with a crust that was a bit mushy—lesson learned.
Water Bath Mastery
Wrap the bottom of the springform pan in a double layer of heavy-duty aluminum foil before placing it in the water bath. This prevents any accidental water seepage, which can make the crust soggy and ruin the texture. The foil also makes cleanup easier because you won’t have to scrub water‑logged crumbs later.
Whipped Cream Perfection
For the topping, use chilled heavy cream and a chilled bowl. Add a pinch of powdered sugar and a splash of vanilla, then whip until soft peaks form. Over‑whipping turns the cream grainy, which clashes with the silky cheesecake. If you want a sturdier topping for slicing, whip just a tad longer to achieve medium peaks, then fold in a spoonful of melted chocolate for extra stability.
Creative Twists and Variations
This recipe is a playground. Here are some of my favorite ways to switch things up:
Chocolate‑Espresso Fusion
Swap half the cocoa powder for finely ground espresso. The coffee note deepens the chocolate flavor and adds a subtle bitterness that balances the sweetness. Perfect for adult gatherings where a coffee‑lovers’ palate is appreciated.
Berry Burst
Fold in a cup of fresh raspberry puree into the filling before baking. The tartness of the berries adds a bright contrast to the rich red velvet, and the pink swirls create a stunning visual effect. Top with fresh berries for an extra pop.
Nutty Crunch
Replace half of the Oreo crumbs in the crust with finely chopped toasted almonds or hazelnuts. This adds a nutty depth and a satisfying crunch that complements the creamy filling. A drizzle of caramel over the top amplifies the nutty sweetness.
White Chocolate Dream
Stir in ½ cup of melted white chocolate into the filling for a sweeter, silkier texture. The white chocolate pairs beautifully with the red hue, creating a sophisticated flavor profile that feels luxurious.
Gluten‑Free Glory
Use gluten‑free Oreo‑style cookies (available in many stores) and substitute the butter with an equal amount of coconut oil. The result is a crust that’s just as crunchy but safe for those with gluten sensitivities. The coconut oil adds a faint tropical note that’s surprisingly pleasant.
Storing and Bringing It Back to Life
Fridge Storage
Cover the cheesecake loosely with plastic wrap or a cake dome and store it in the refrigerator for up to 48 hours. The flavors will continue to meld, making each bite richer. If you notice a thin layer of moisture on top, gently pat it away with a paper towel before serving.
Freezer Friendly
Wrap the entire cheesecake (still in the springform pan) in a double layer of freezer‑safe plastic wrap, then place it inside a large zip‑top bag. Freeze for up to 2 weeks. To thaw, move it to the fridge overnight; this gradual thaw preserves the texture and prevents a soggy crust.
Best Reheating Method
When you’re ready to serve a frozen slice, place it on a microwave‑safe plate, add a tiny splash (about a teaspoon) of water, and microwave on low for 10‑15 seconds. The water creates steam that revives the cheesecake’s creamy interior without drying it out. Alternatively, let the slice sit at room temperature for 20 minutes; the aroma will awaken your senses.